Decorated Whipped Cream Cake Roll

This cake is a labor of love……not just for Valentines Day, but for any special occasion.
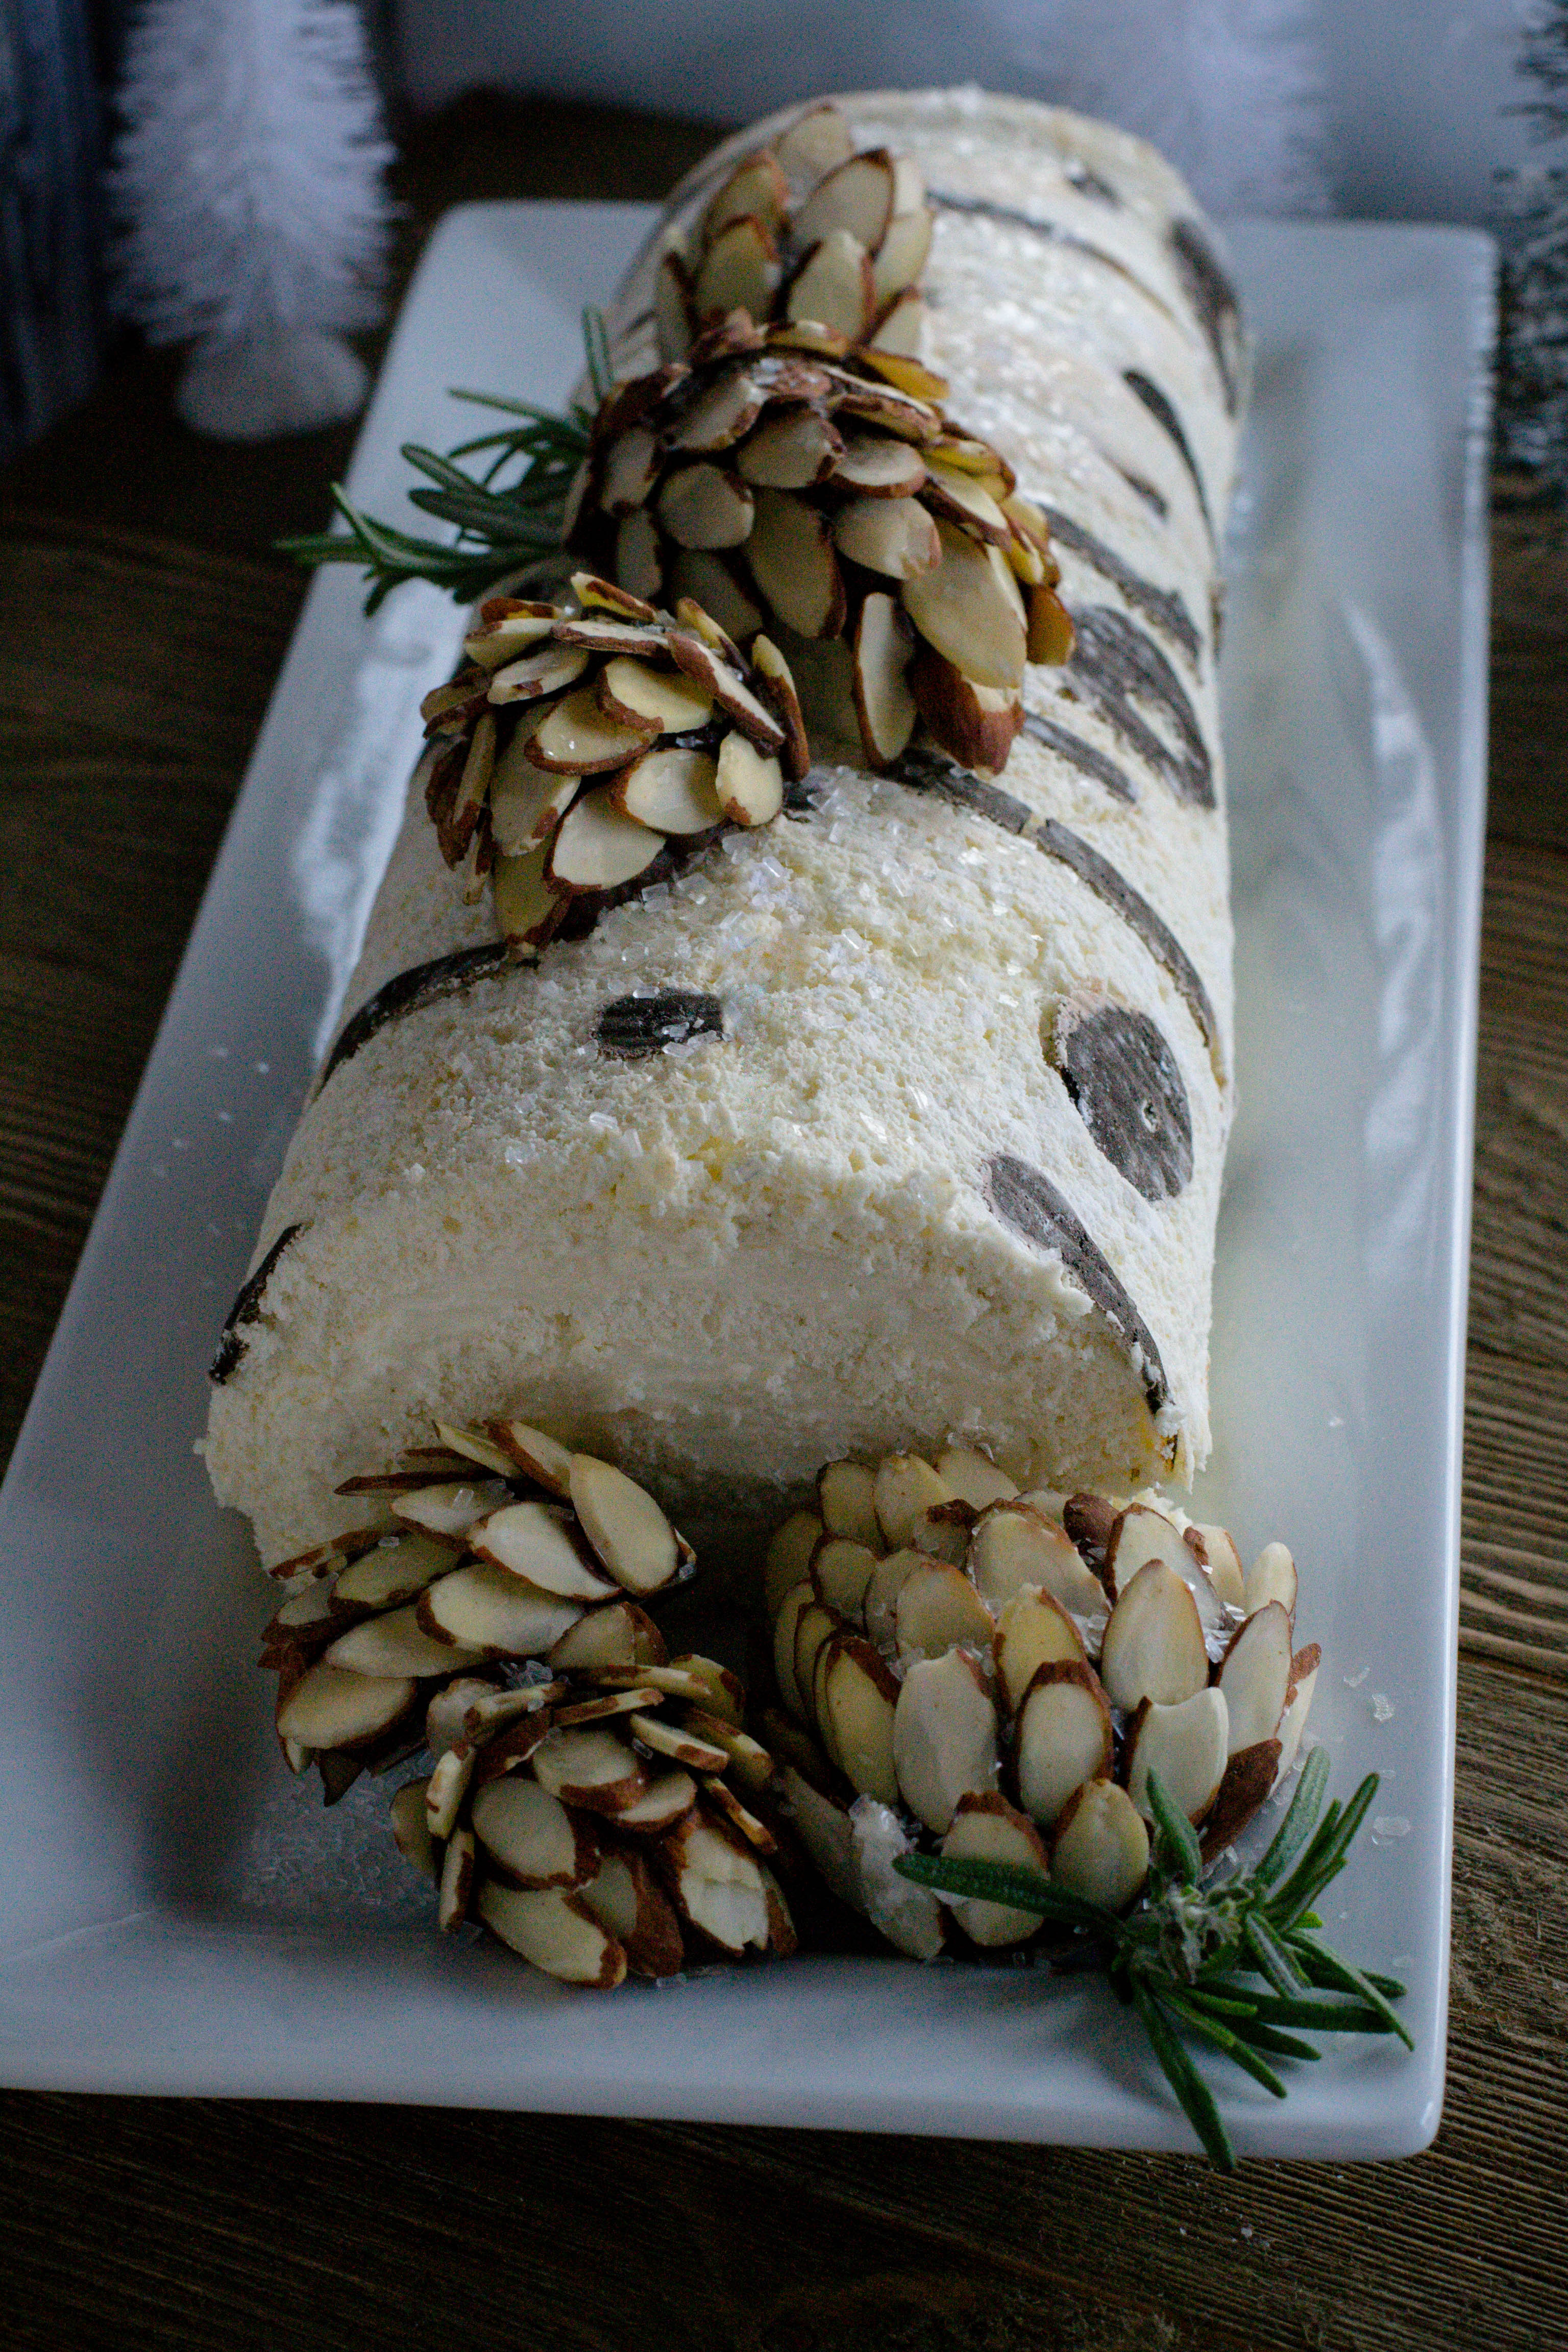
My idea for the first cake, I made for Christmas, came from the TV show Great American Baking Show. I love that show, and was very sad that it was canceled.
On the show, the challenge was to make a swiss roll cake, and some of the contestants decorated the cake by placing the decoration on the baking sheet, baking it a few minutes, then covering with the cake batter. When they rolled the cake, the outside had a beautiful design. Challenge accepted!!
For my Christmas Cake the decoration was a birch pattern. It turned out beautiful. I was very impressed with myself.
Even if this cake would have been a total flop…..like my first Valentines attempt….more on that later. This cake is the most delicious cake I have ever put in my mouth.
After a huge Christmas dinner Tim and I didn’t have dessert until much later that day. As we were eating it Tim said “ You know how sometimes when you are eating something and someone asks for a bite?” I said “Yes”. He said “If someone ask for a bite of this, I would say no….thats how good it is”….. I totally agreed!!
I never got around to posting the recipe for the Christmas cake, so I thought I would revamp it with a Valentines theme.
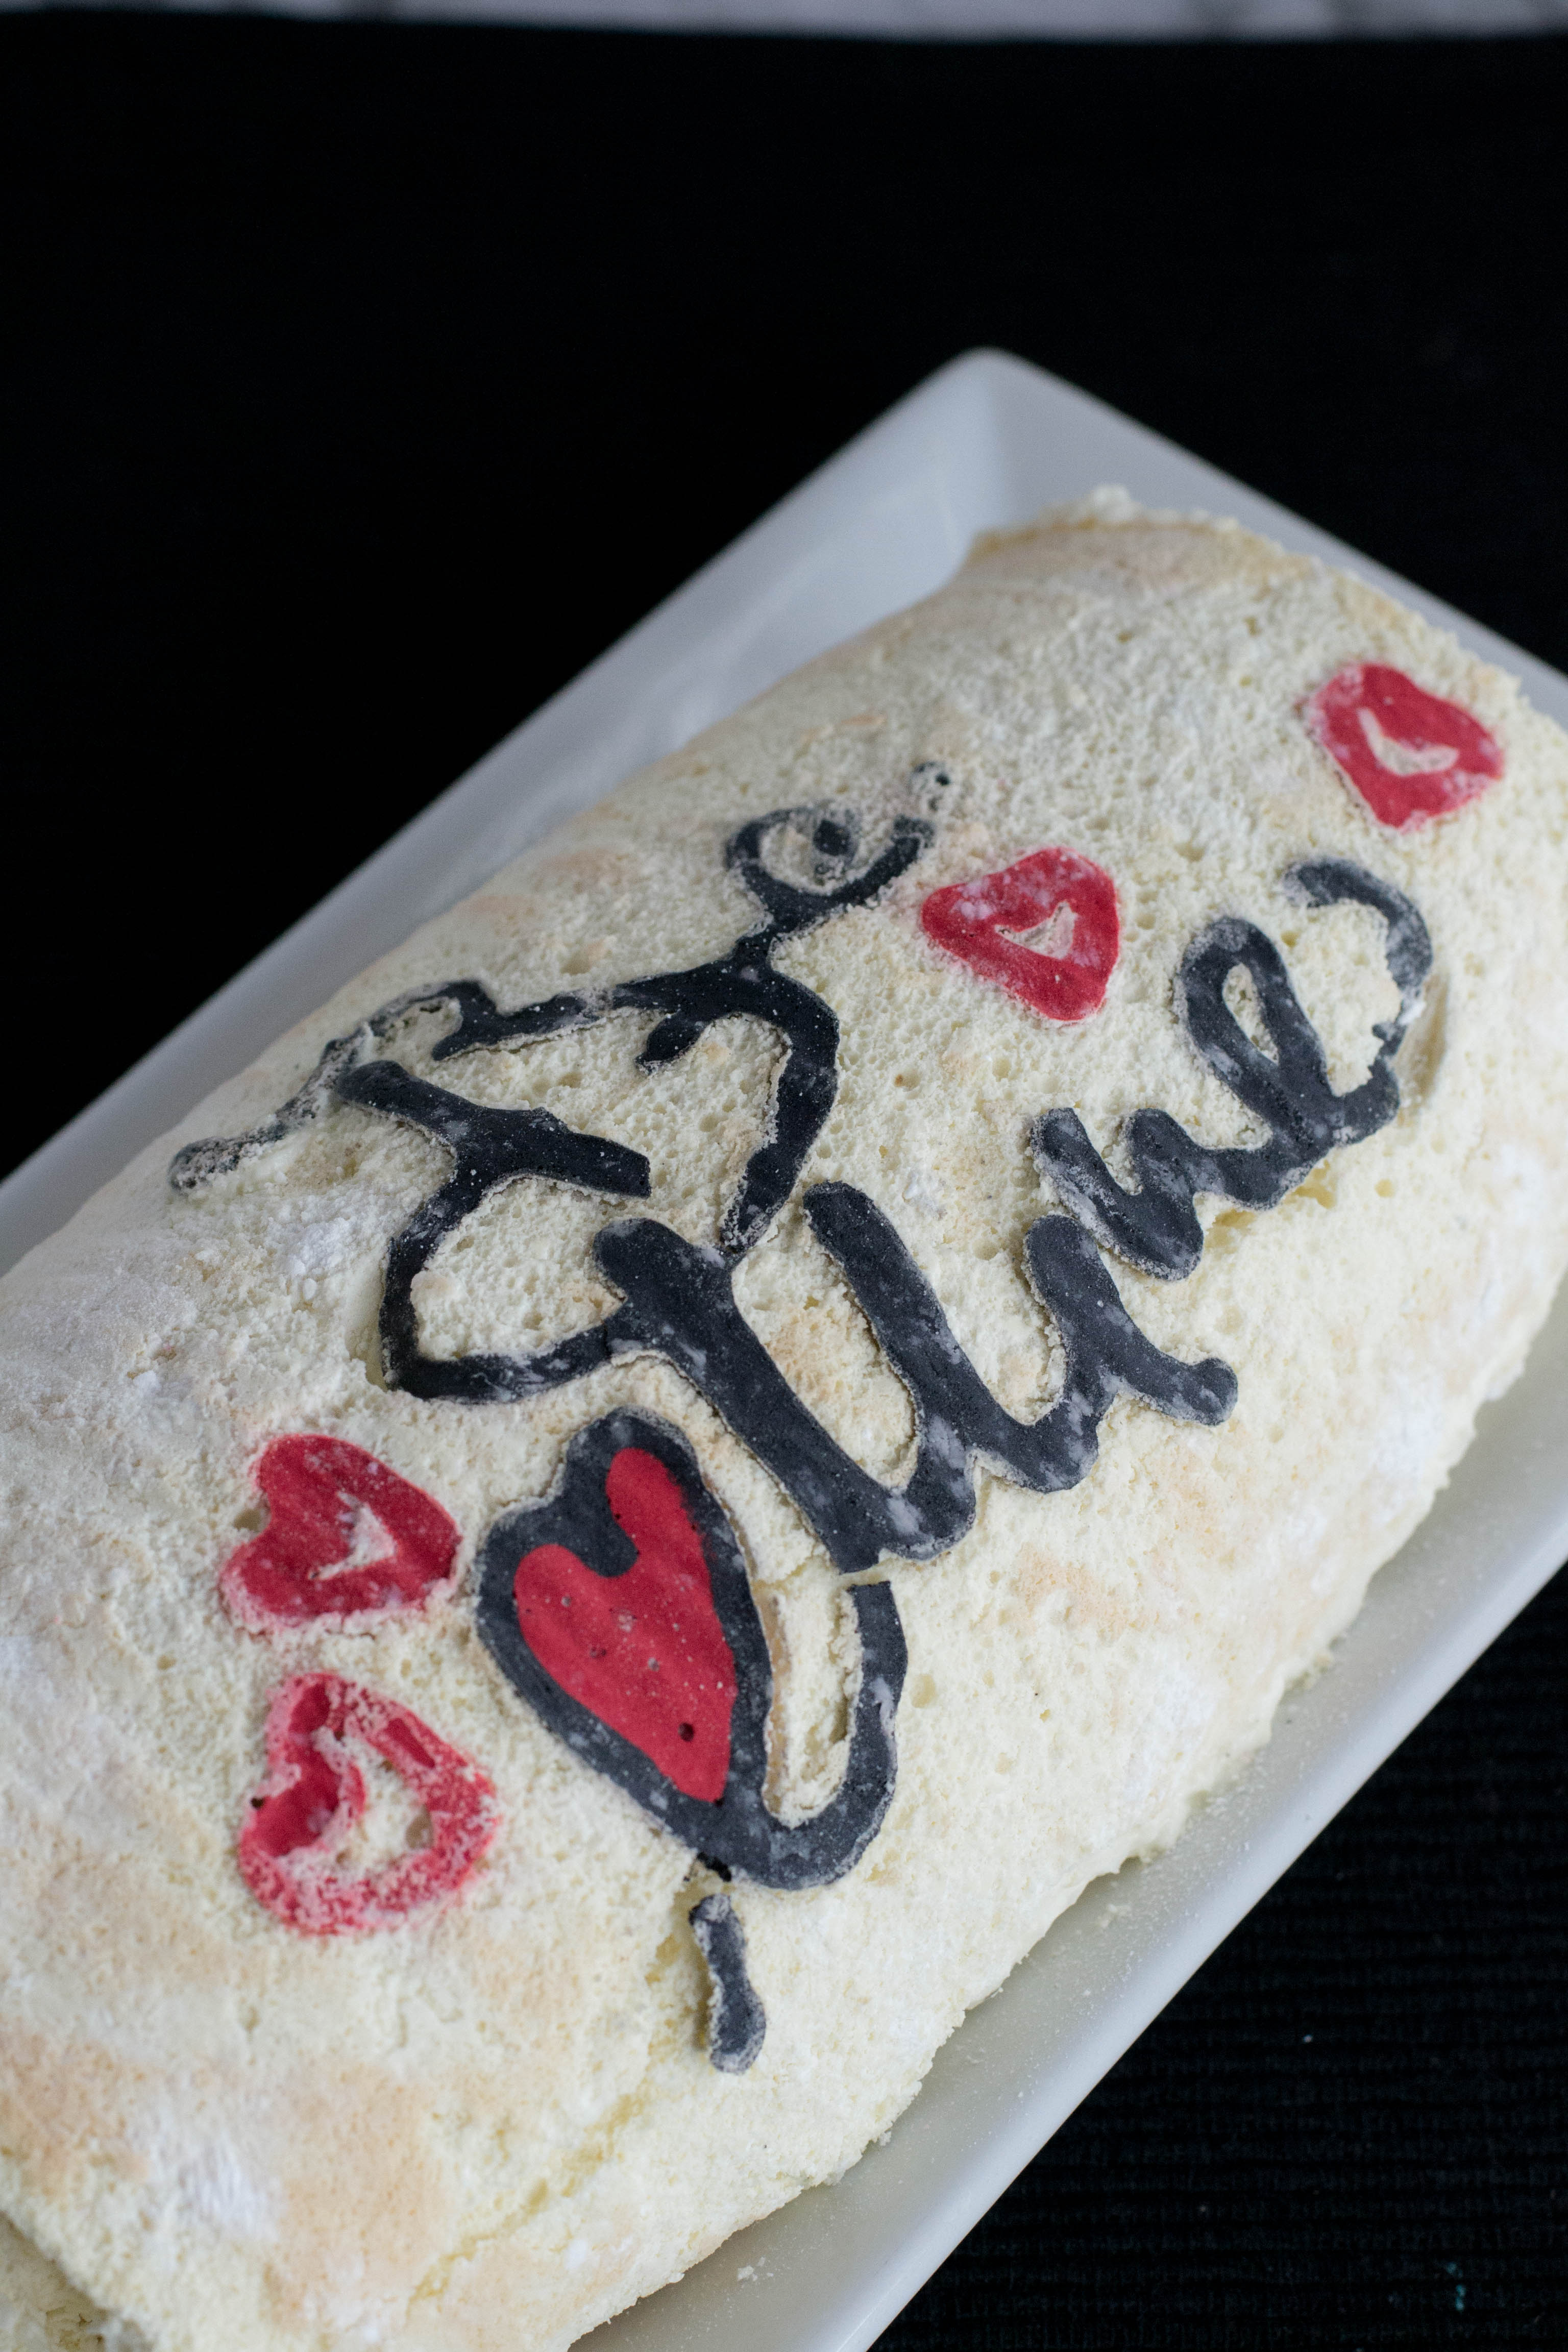
It was a disaster!! I’m still not sure what happened, but it was not the easy and perfect cake I achieved on my first try.
Try number two!! After a total revamp of the design, I discovered that, instead of baking the design, I placed it in the freezer, and it was a much easier and cleaner application.
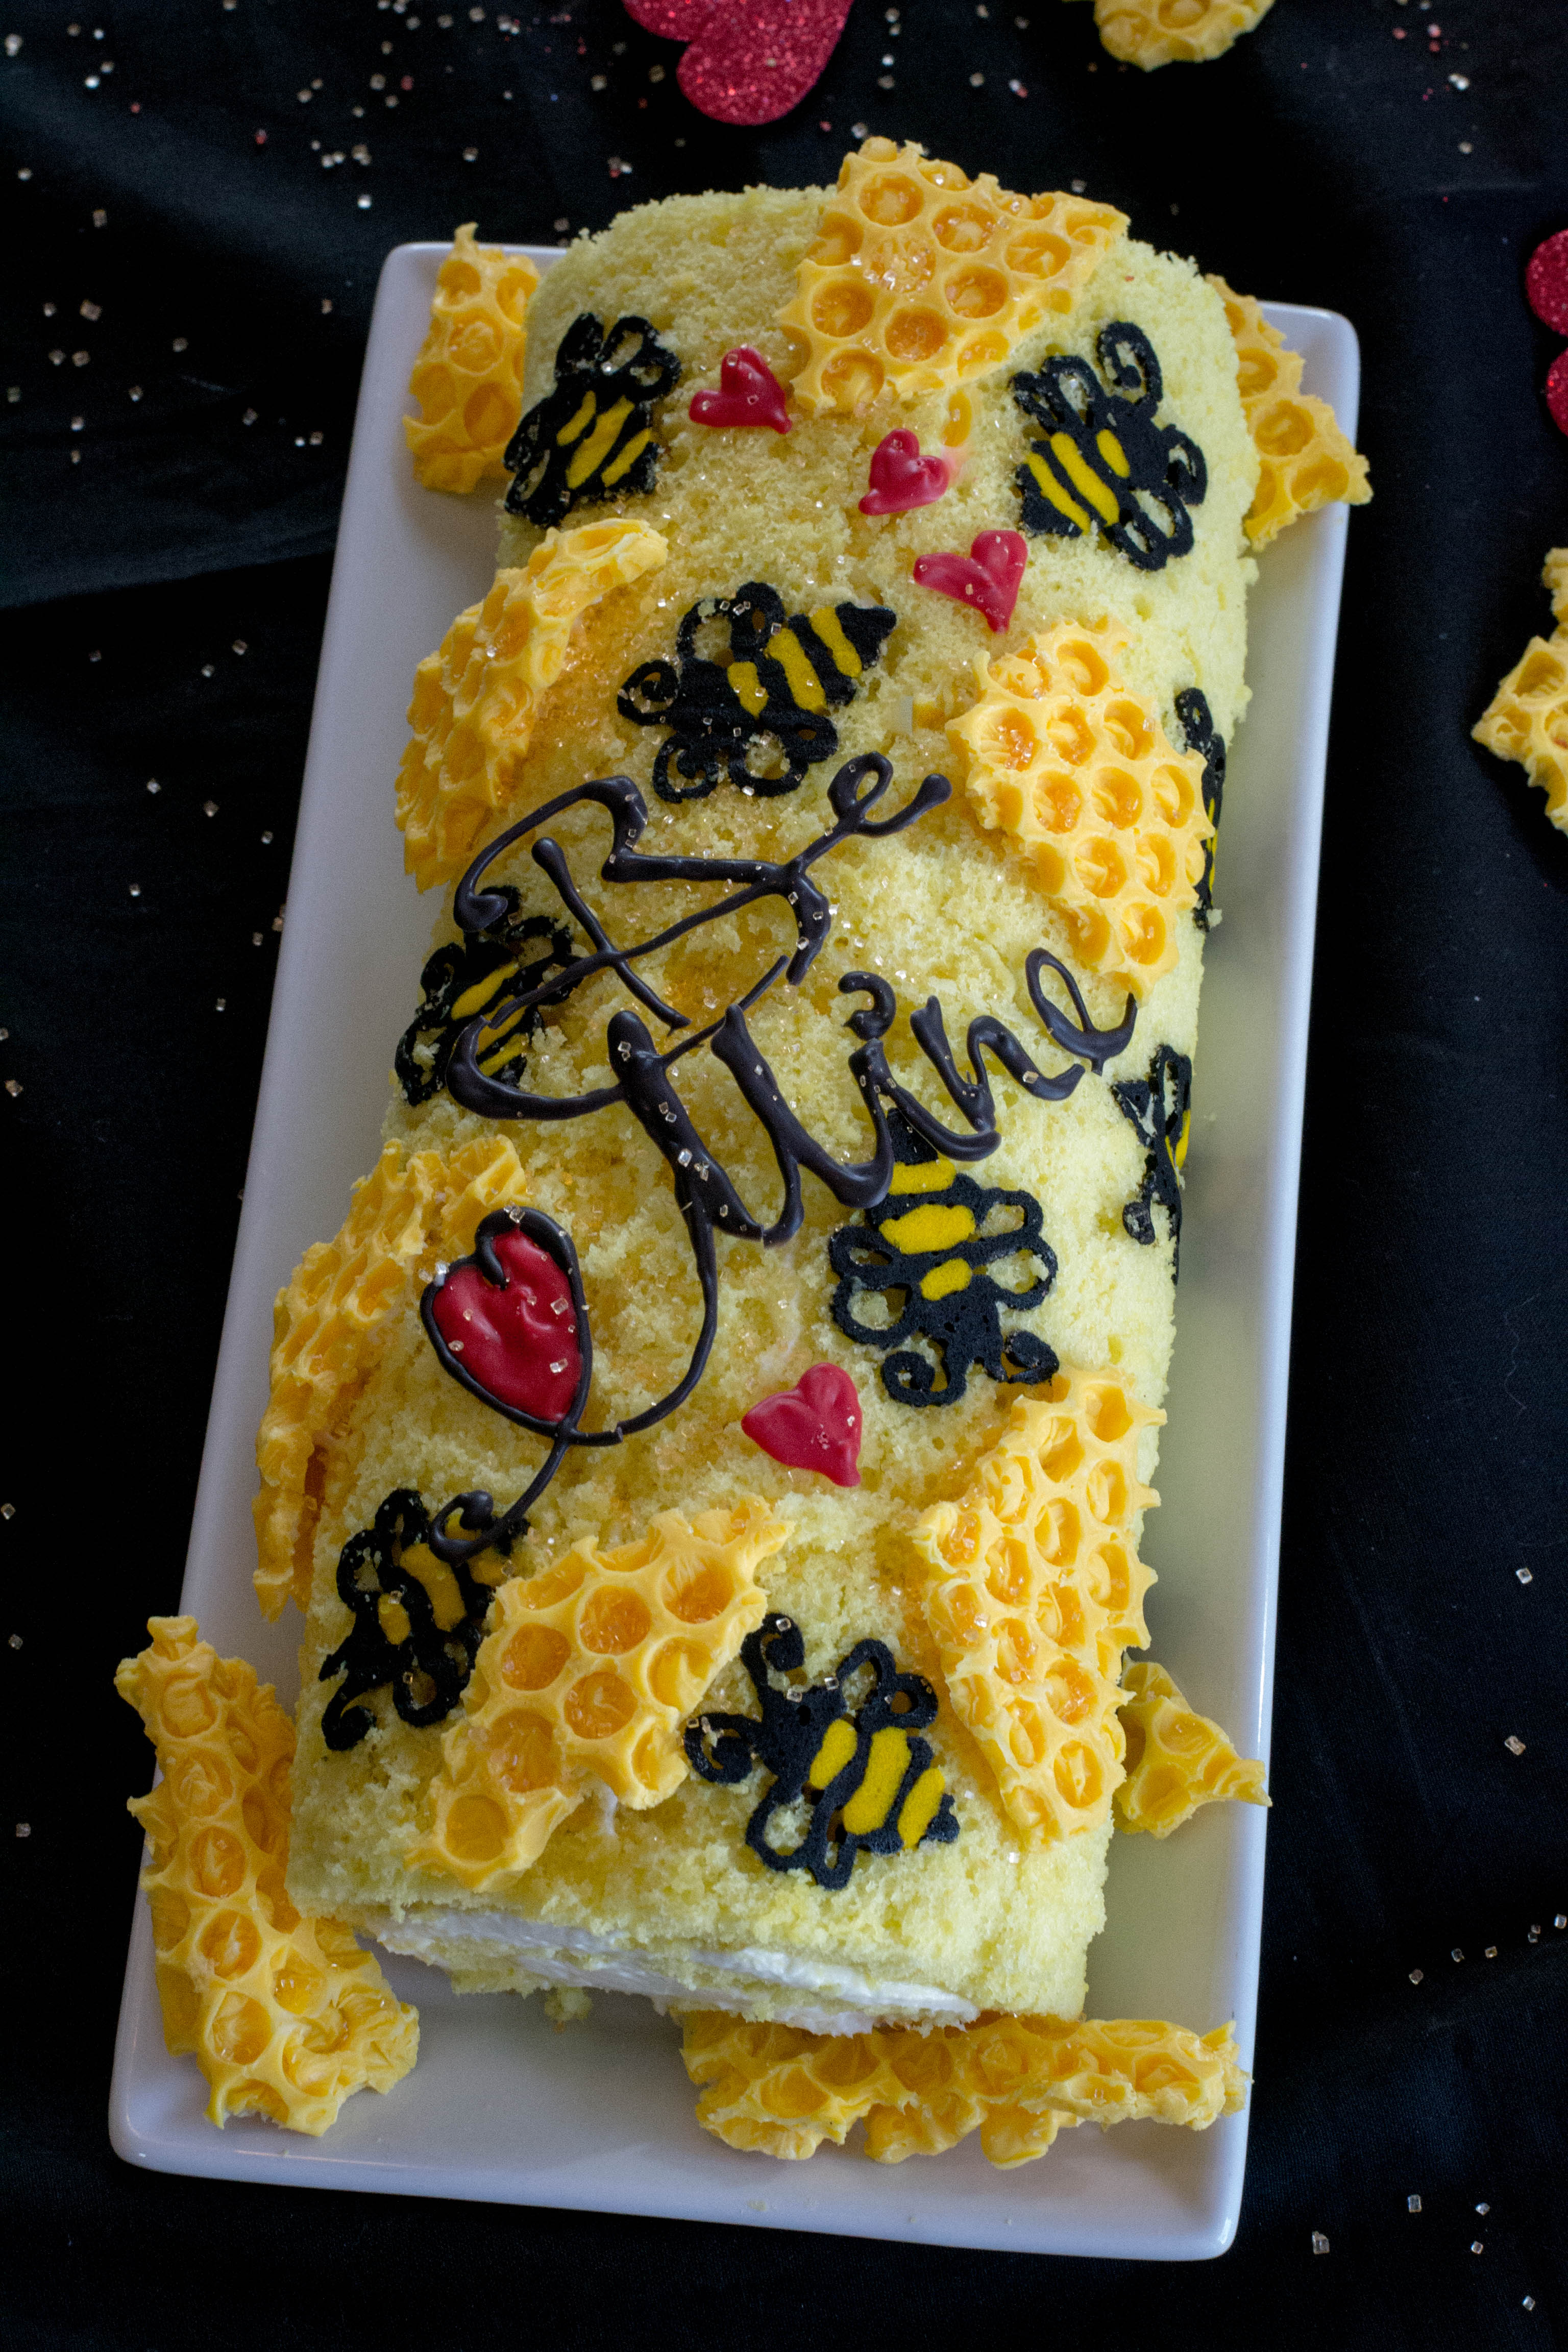
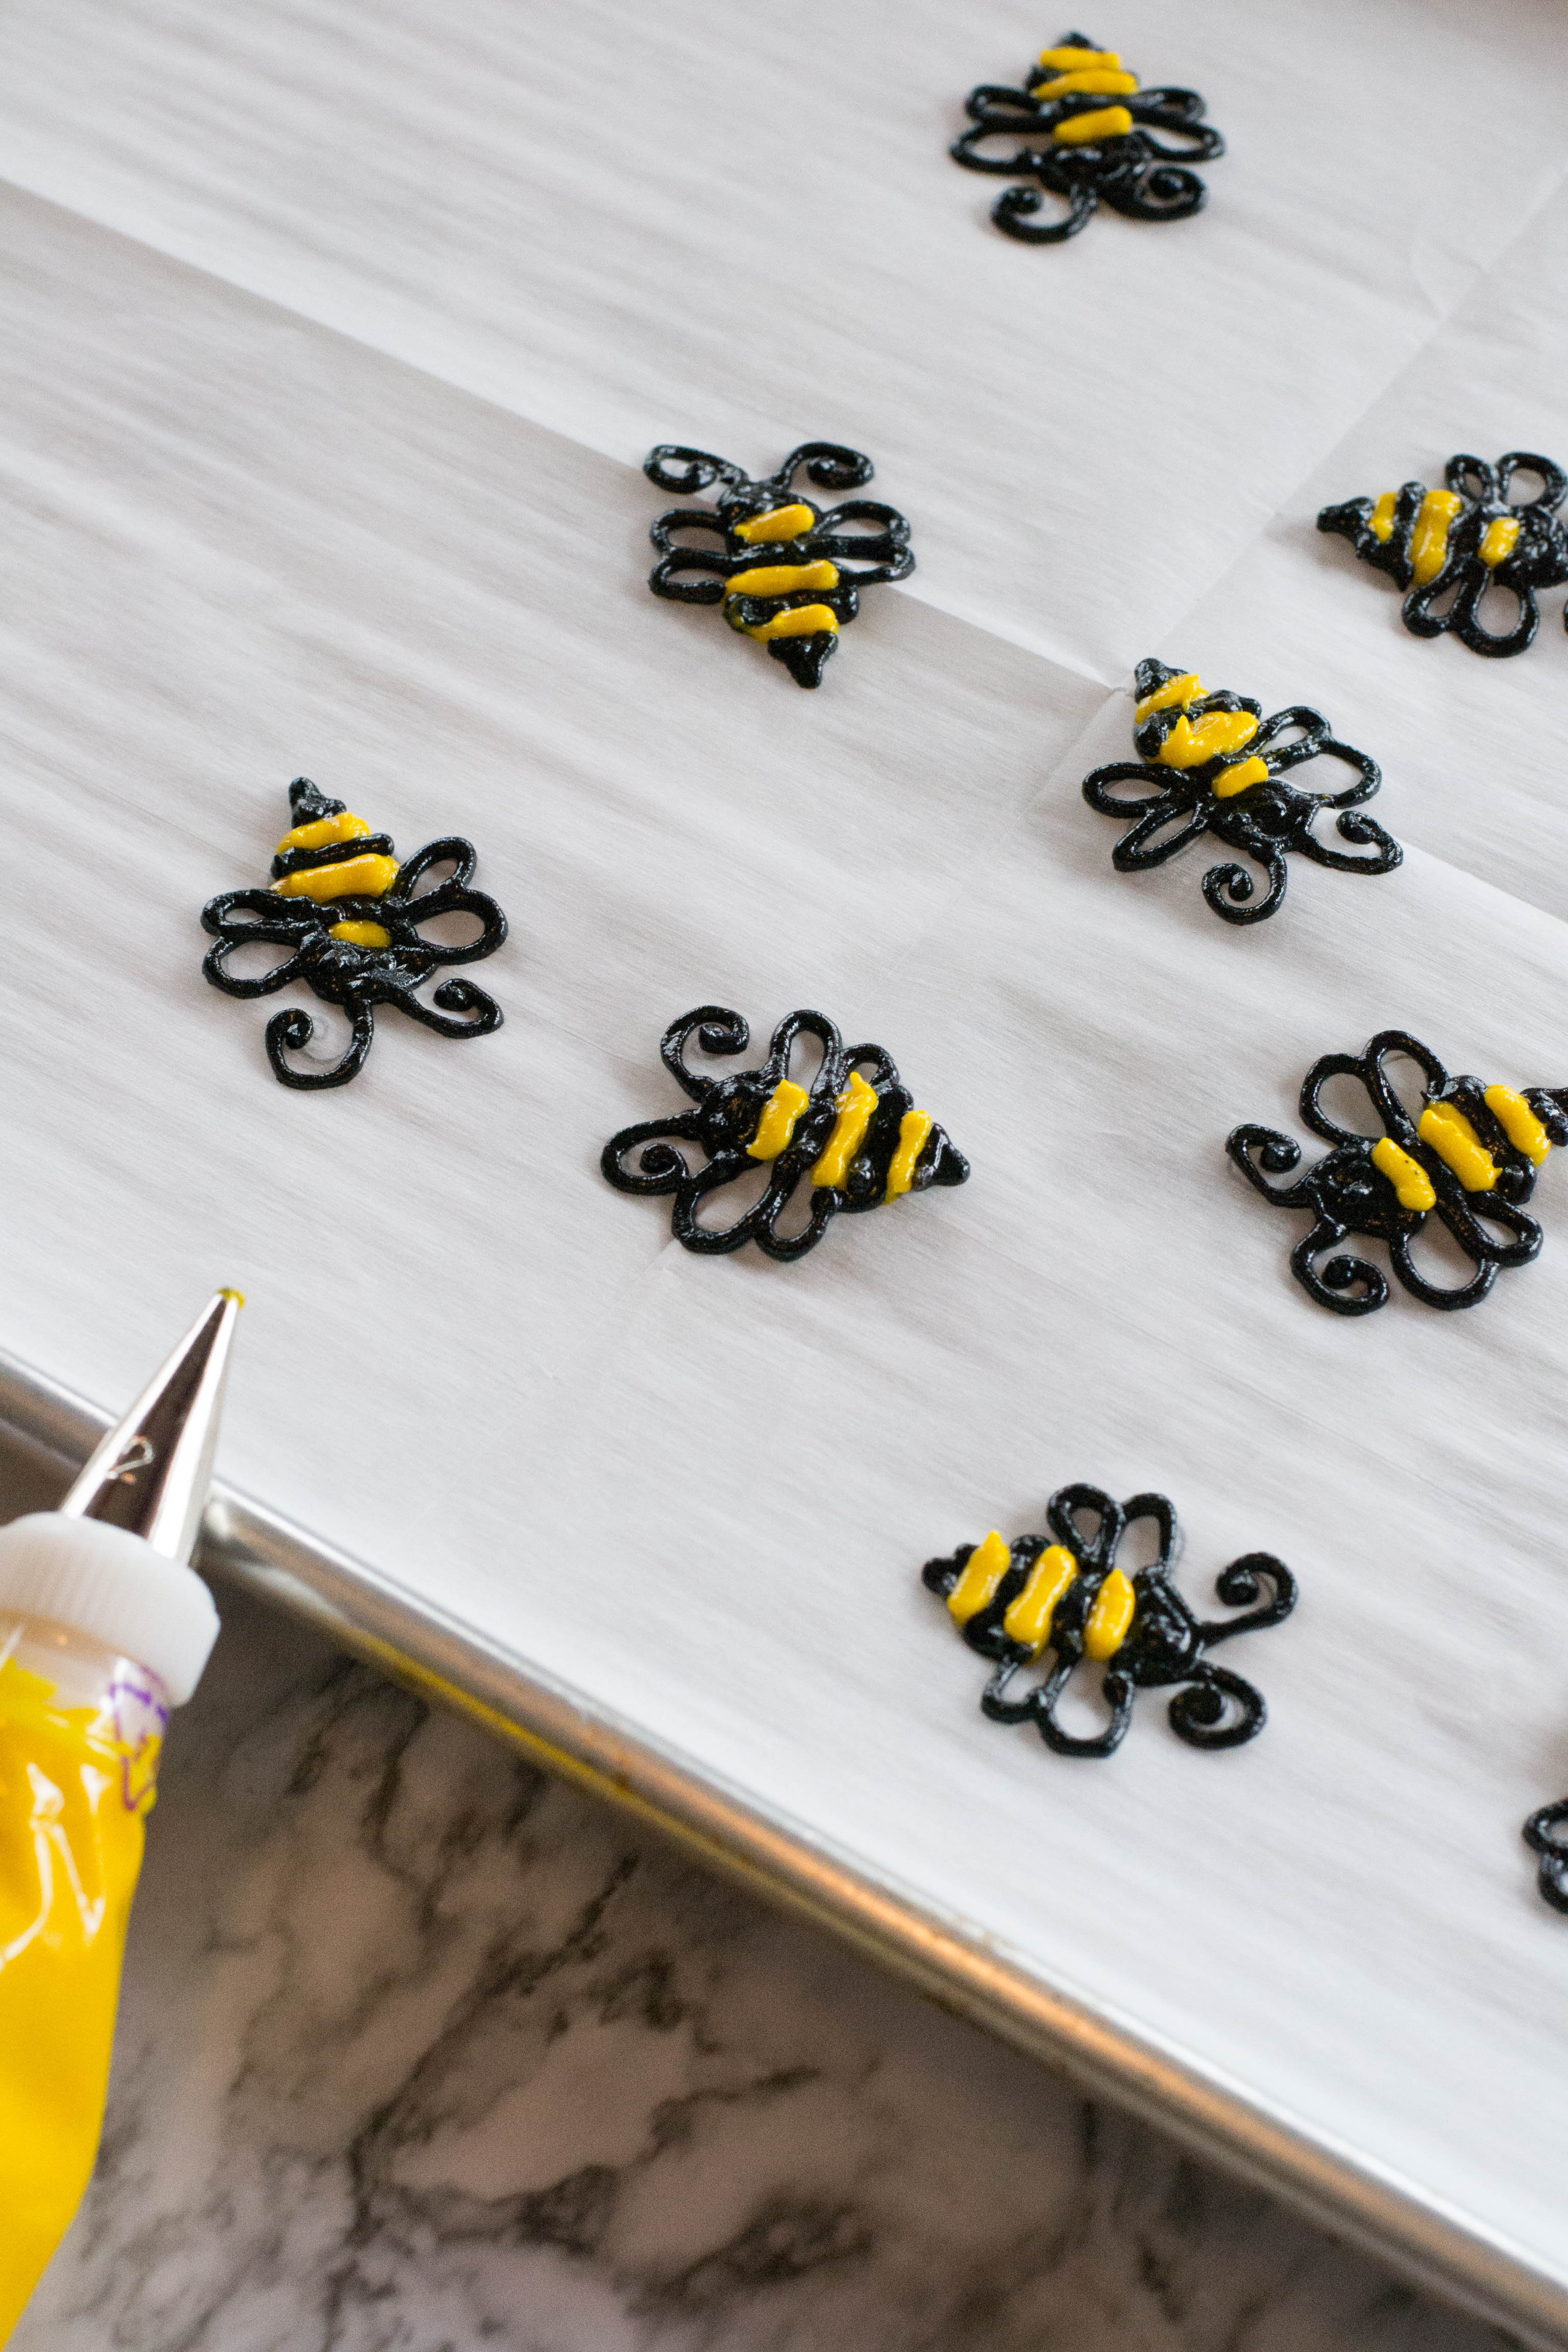
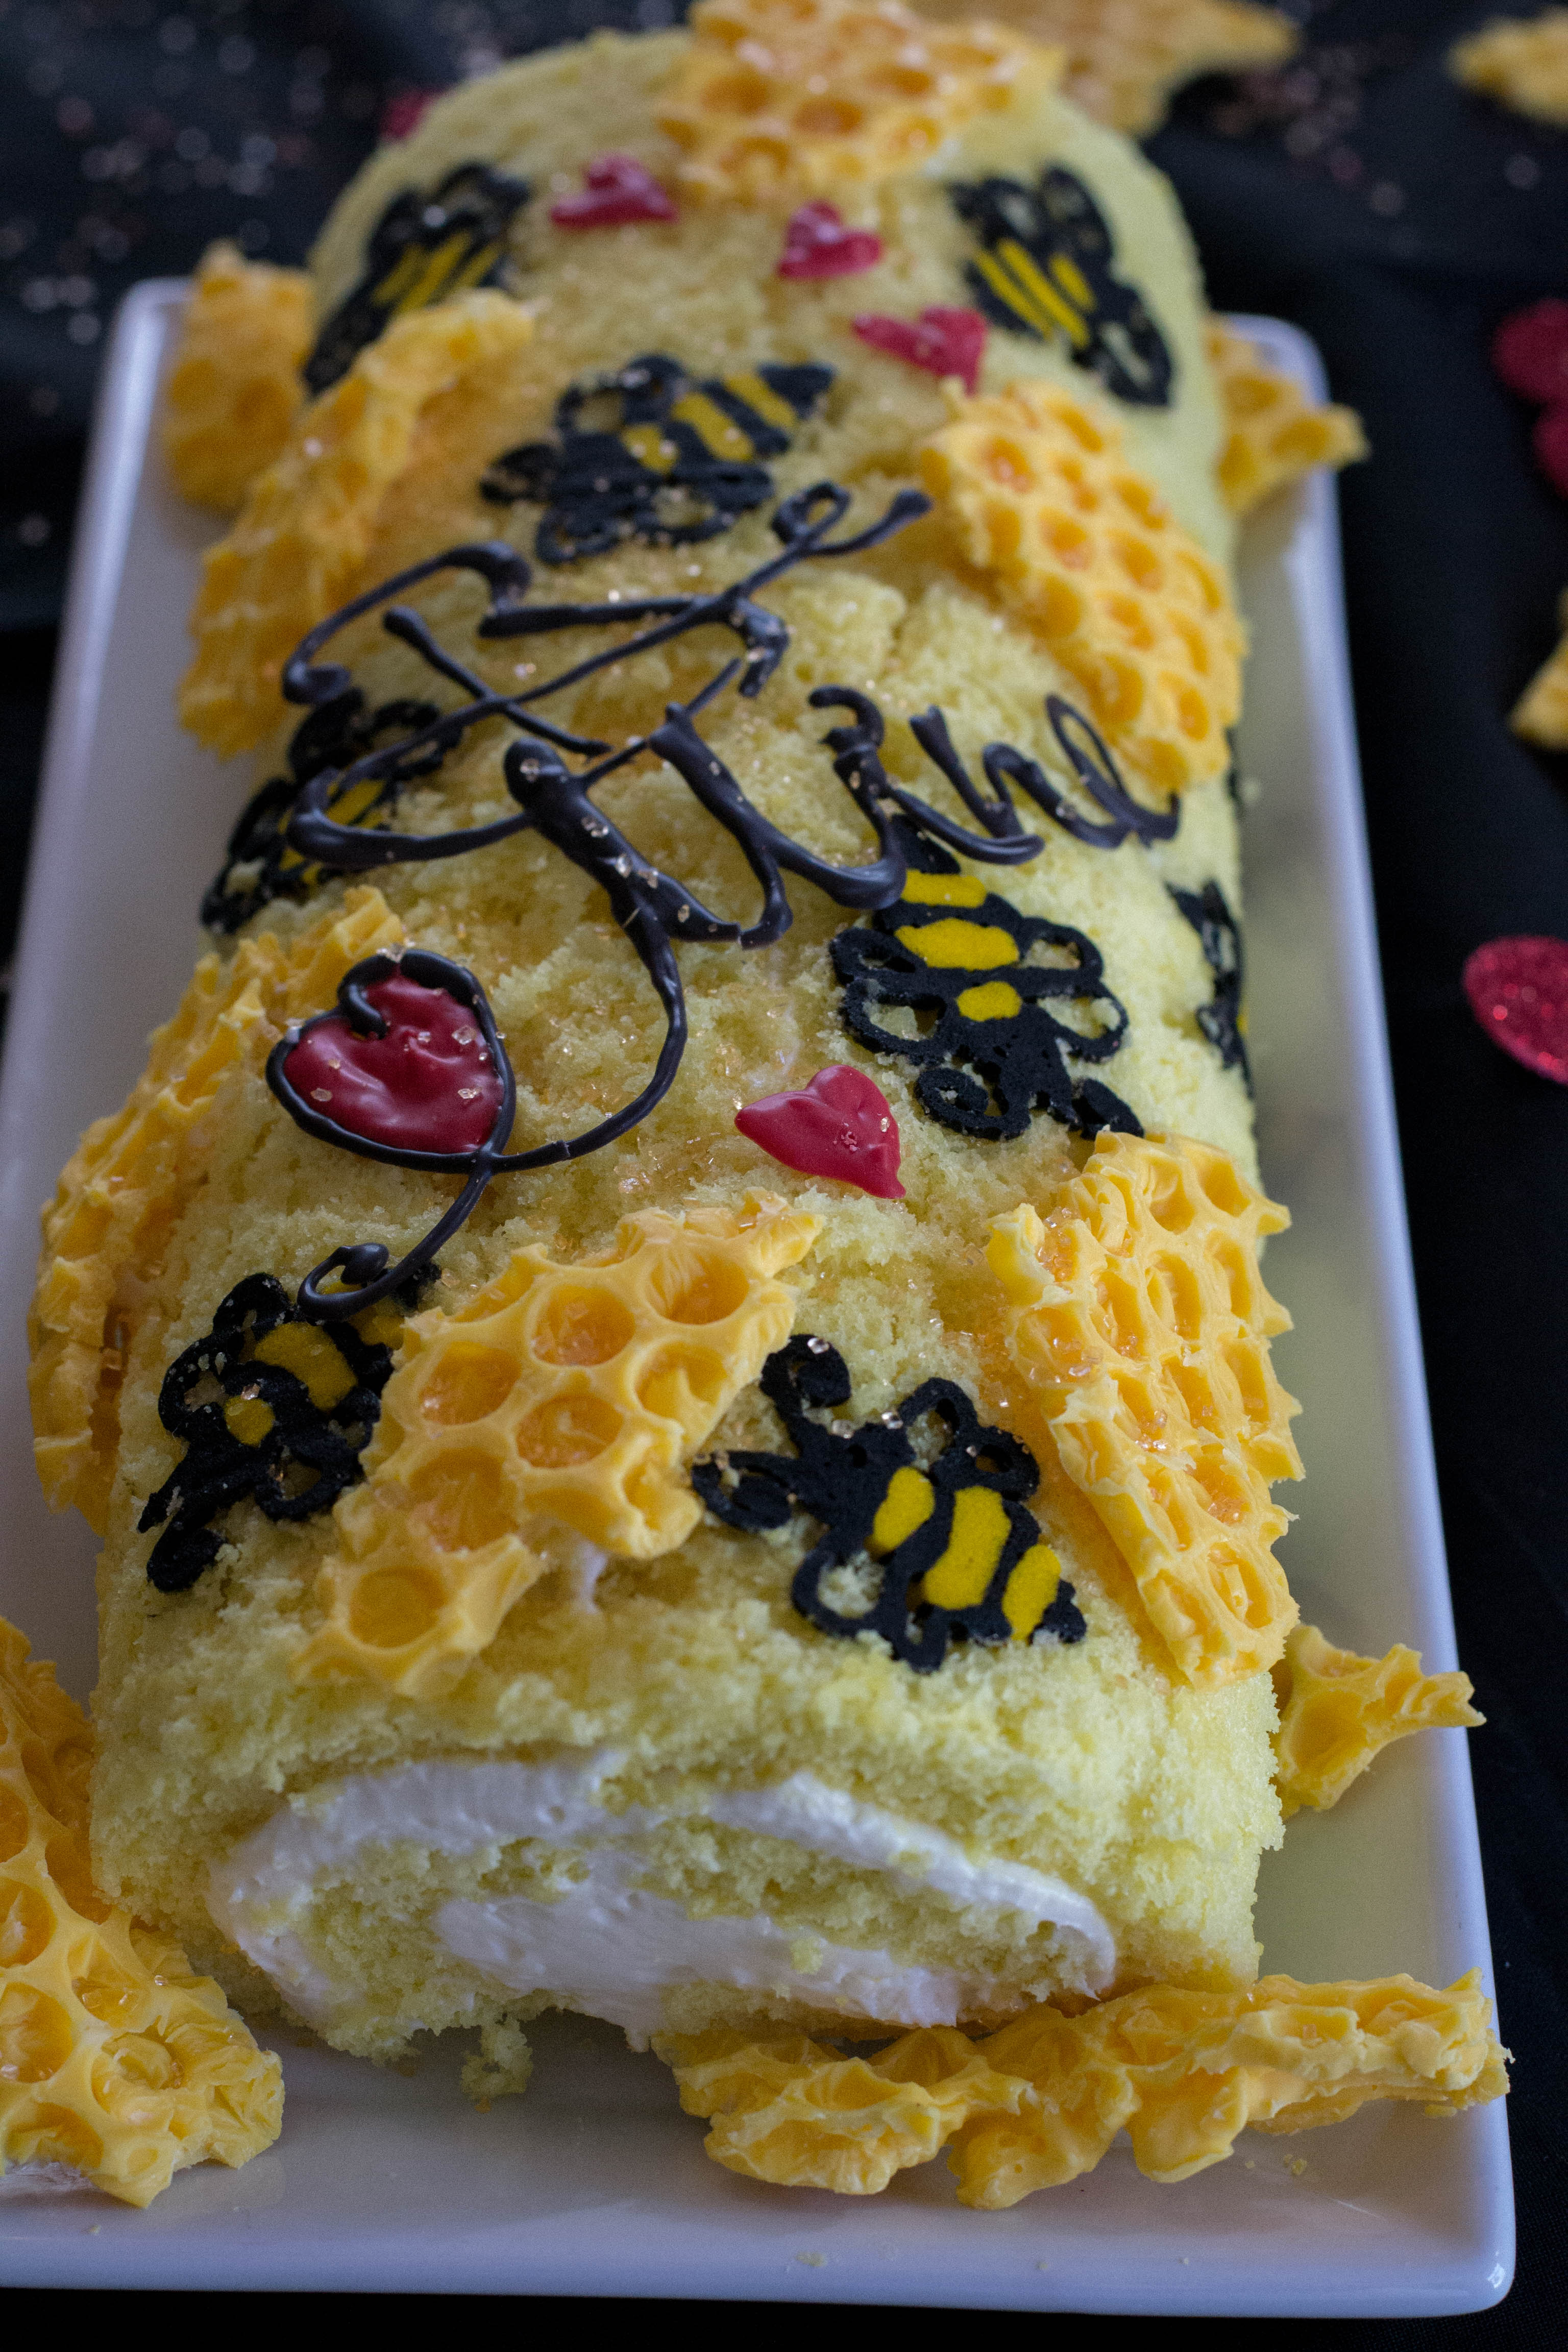
A play on Be Mine using bees and honeycomb was the direction I wanted to go. Using a simple bee pattern I piped batter over the design, popped it in the freezer, and made the rest of the cake.


As I said this is a labor of love, it is not super easy and it does require some baking skill. While I am not a “baker” I can hold my own. Reading the directions and watching a few You Tube videos helped me immensely.
Pinterest, oh Pinterest what would I do without you??? I had a vision of a honeycomb pattern on my cake. The final product was not my original vision, but I think it turned out cute.
Colored candy melts (yellow) spread over bubble wrap makes perfect honeycomb. That same colored candy melts(black) piped my wording and once hardened was placed on the cake. Some yellow sugar and a few red hearts…….ta da!!! A cute Decorated Whipped Cream Cake Roll.
The ideas for this cake are endless and the flavor of the cake will make you want to make it again and again.
Print
Decorated Whipped Cream Cake Roll
- Yield: 12 servings
Ingredients
- 6 ounces cake flour
- 1 1/2 teaspoons baking powder
- 1/2 teaspoon salt
- 1 cup heavy cream
- 2 eggs, room temperature
- 1 teaspoon vanilla extract
- 6 ounces sugar
- Design Batter
- 1/4 cup flour
- 4 tablespoons powdered sugar
- 1 tablespoon room temperature butter
- 1 room temp egg white
- Filling
- 12 ounces cream cheese at room temperature
- 1 cup powdered sugar
- 1/2 teaspoon vanilla extract
- 1 cup heavy cream
Instructions
- Line a 18 X 13 inch baking sheet with 1 inch sides with parchment paper sprayed with non stick spray.
- For the design cream in a small bowl cream together butter and powdered sugar. Beat in the egg white until well blended. Mix in flour. Divide (if using more than one color) and color as desired.
- Place batter into piping bags. Place your desired pattern (make your own or download from internet). Place your template under the parchment paper on baking sheet. If doing alphabets or number patterns, be sure to invert(mirror) the image.
- Using the piping batter neatly pipe over your design. Place baking sheet in freezer for about 15 minutes to harden the batter.
- Preheat the oven to 375°F. Set rack in the lower third of oven.
- In a medium bowl, sift together the flour, baking powder and salt and set aside.
- In a second small bowl, whisk together the eggs and vanilla and set aside.
- In a third bowl, whip the heavy cream until a stiff peak form. On medium high speed, add the egg mixture to the whipped cream and beat. Add the sugar to the mixture in a slow trickle while beating.
- Fold in half of the flour mixture to the cream mixture until most of it has incorporated. Then fold in the remaining flour and continue to fold until all the flour and cream have been combined. You will have a thick batter.
- Remove baking sheet from freezer and spread your cake batter batter into your prepared sheet pan covering your design, spreading evenly to the edges of baking sheet with an offset spatula.
- Bake for 10 minutes, until the cake springs back when touched lightly in the center. Do not over bake.
- Allow the cake to cool on a wire rack, for about 5 minutes in the pan. While the cake is cooling, sprinkle powdered sugar on a kitchen towel or sheet of parchment paper bigger than the size of your sheet pan. Once the cake is baked, flip it onto the sugar dusted kitchen towel/parchment paper
- Once flipped over, pull the parchment paper out from the cake. Be gentle when taking out the parchment paper over the decorated area. Flip the cake over again carefully onto another towel. Using another baking sheet helps with this.
- Gently fold the edge of the tea towel over the end of the cake and roll it up while the cake is still warm. Don’t force the cake, particularly the leading edge, roll slowly and gently to prevent cracking.
- Allow cake to cool while making the filling.
- In your stand mixer with a whip attachment beat the heavy cream to nearly stiff peaks. Scrape whipped cream into a small bowl and set aside.
- In the same bowl (no need to wash). Sift the powdered sugar and add the cream cheese and vanilla to the bowl using the paddle attachment beat until fluffy.
- Add the whipped cream into the cheese mixture, scrape down the sides of your bowl and beat to combine. Do not over beat.
- Gently unroll the cooled cake, taking care to do it slowly so not to produce cracking. Thickly spread the cream cheese frosting over the cake.
- Now gently roll the cake back up, peeling away the tea-towel as you roll. Place the roll on a serving platter trimming the ends with a serrated knife neaten the roll.
- Decorate further if you desire.
- Store covered in the refrigerator for up to four days. Allowing roll to stand 10 minutes before serving.