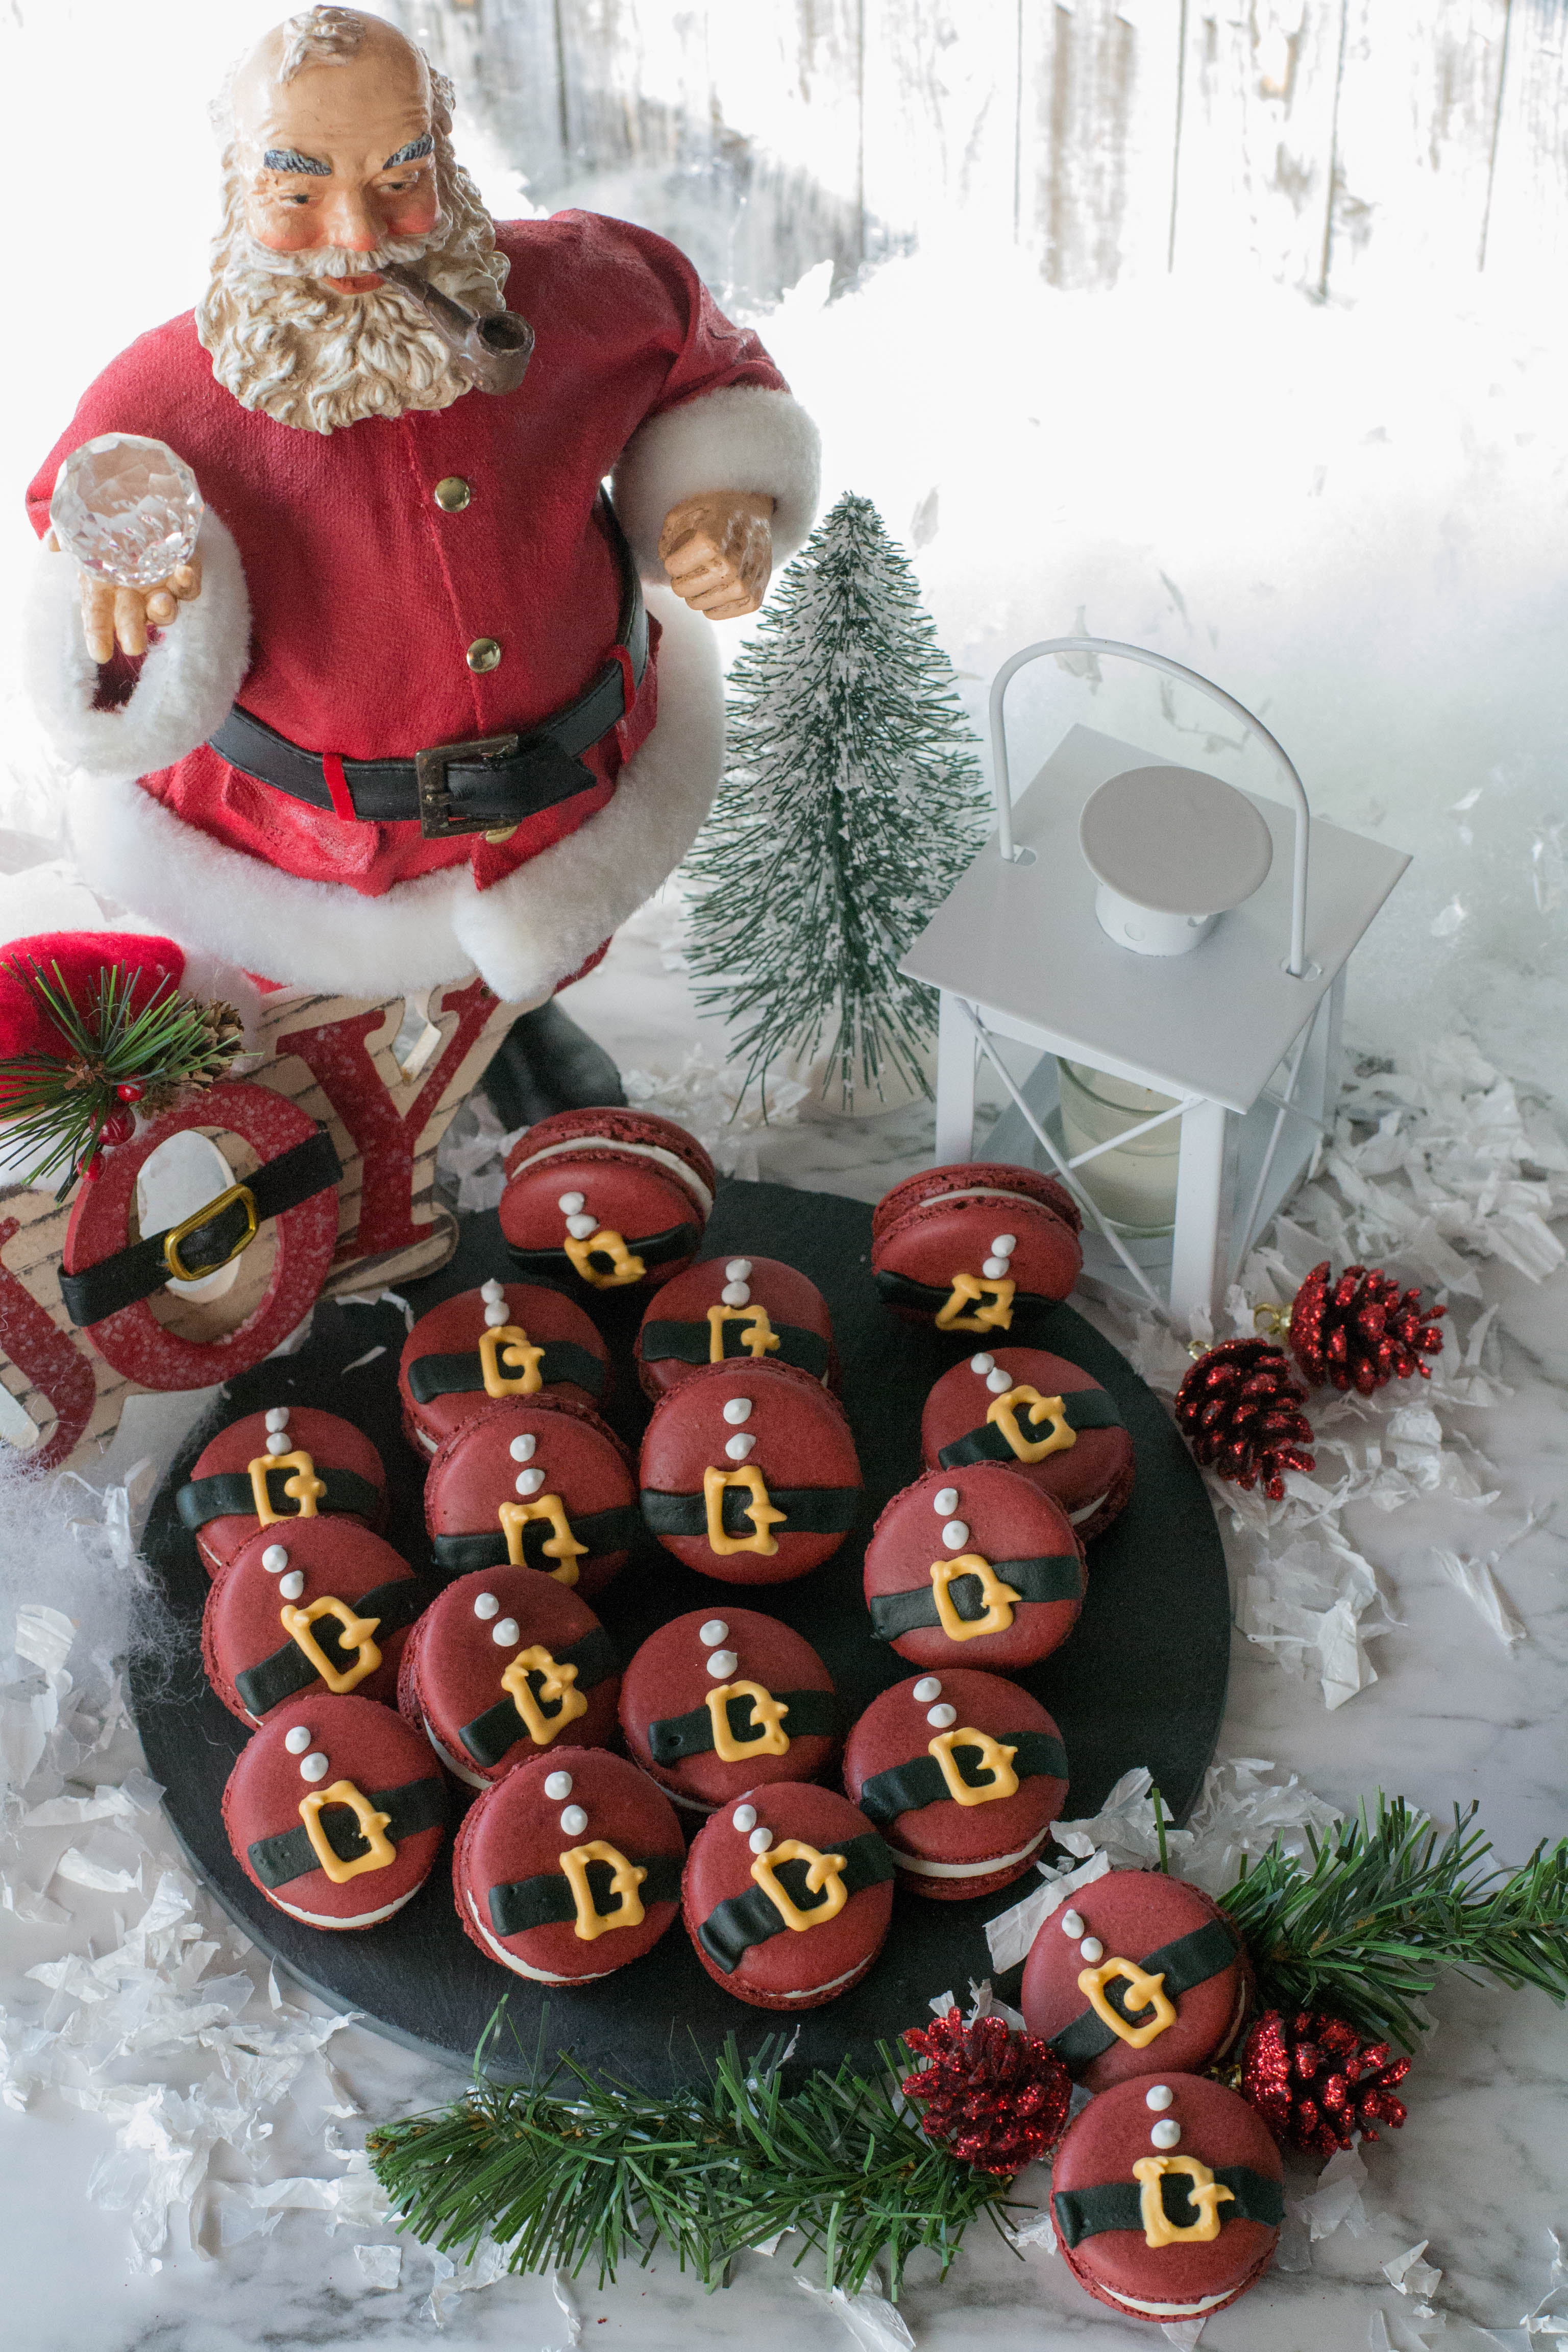
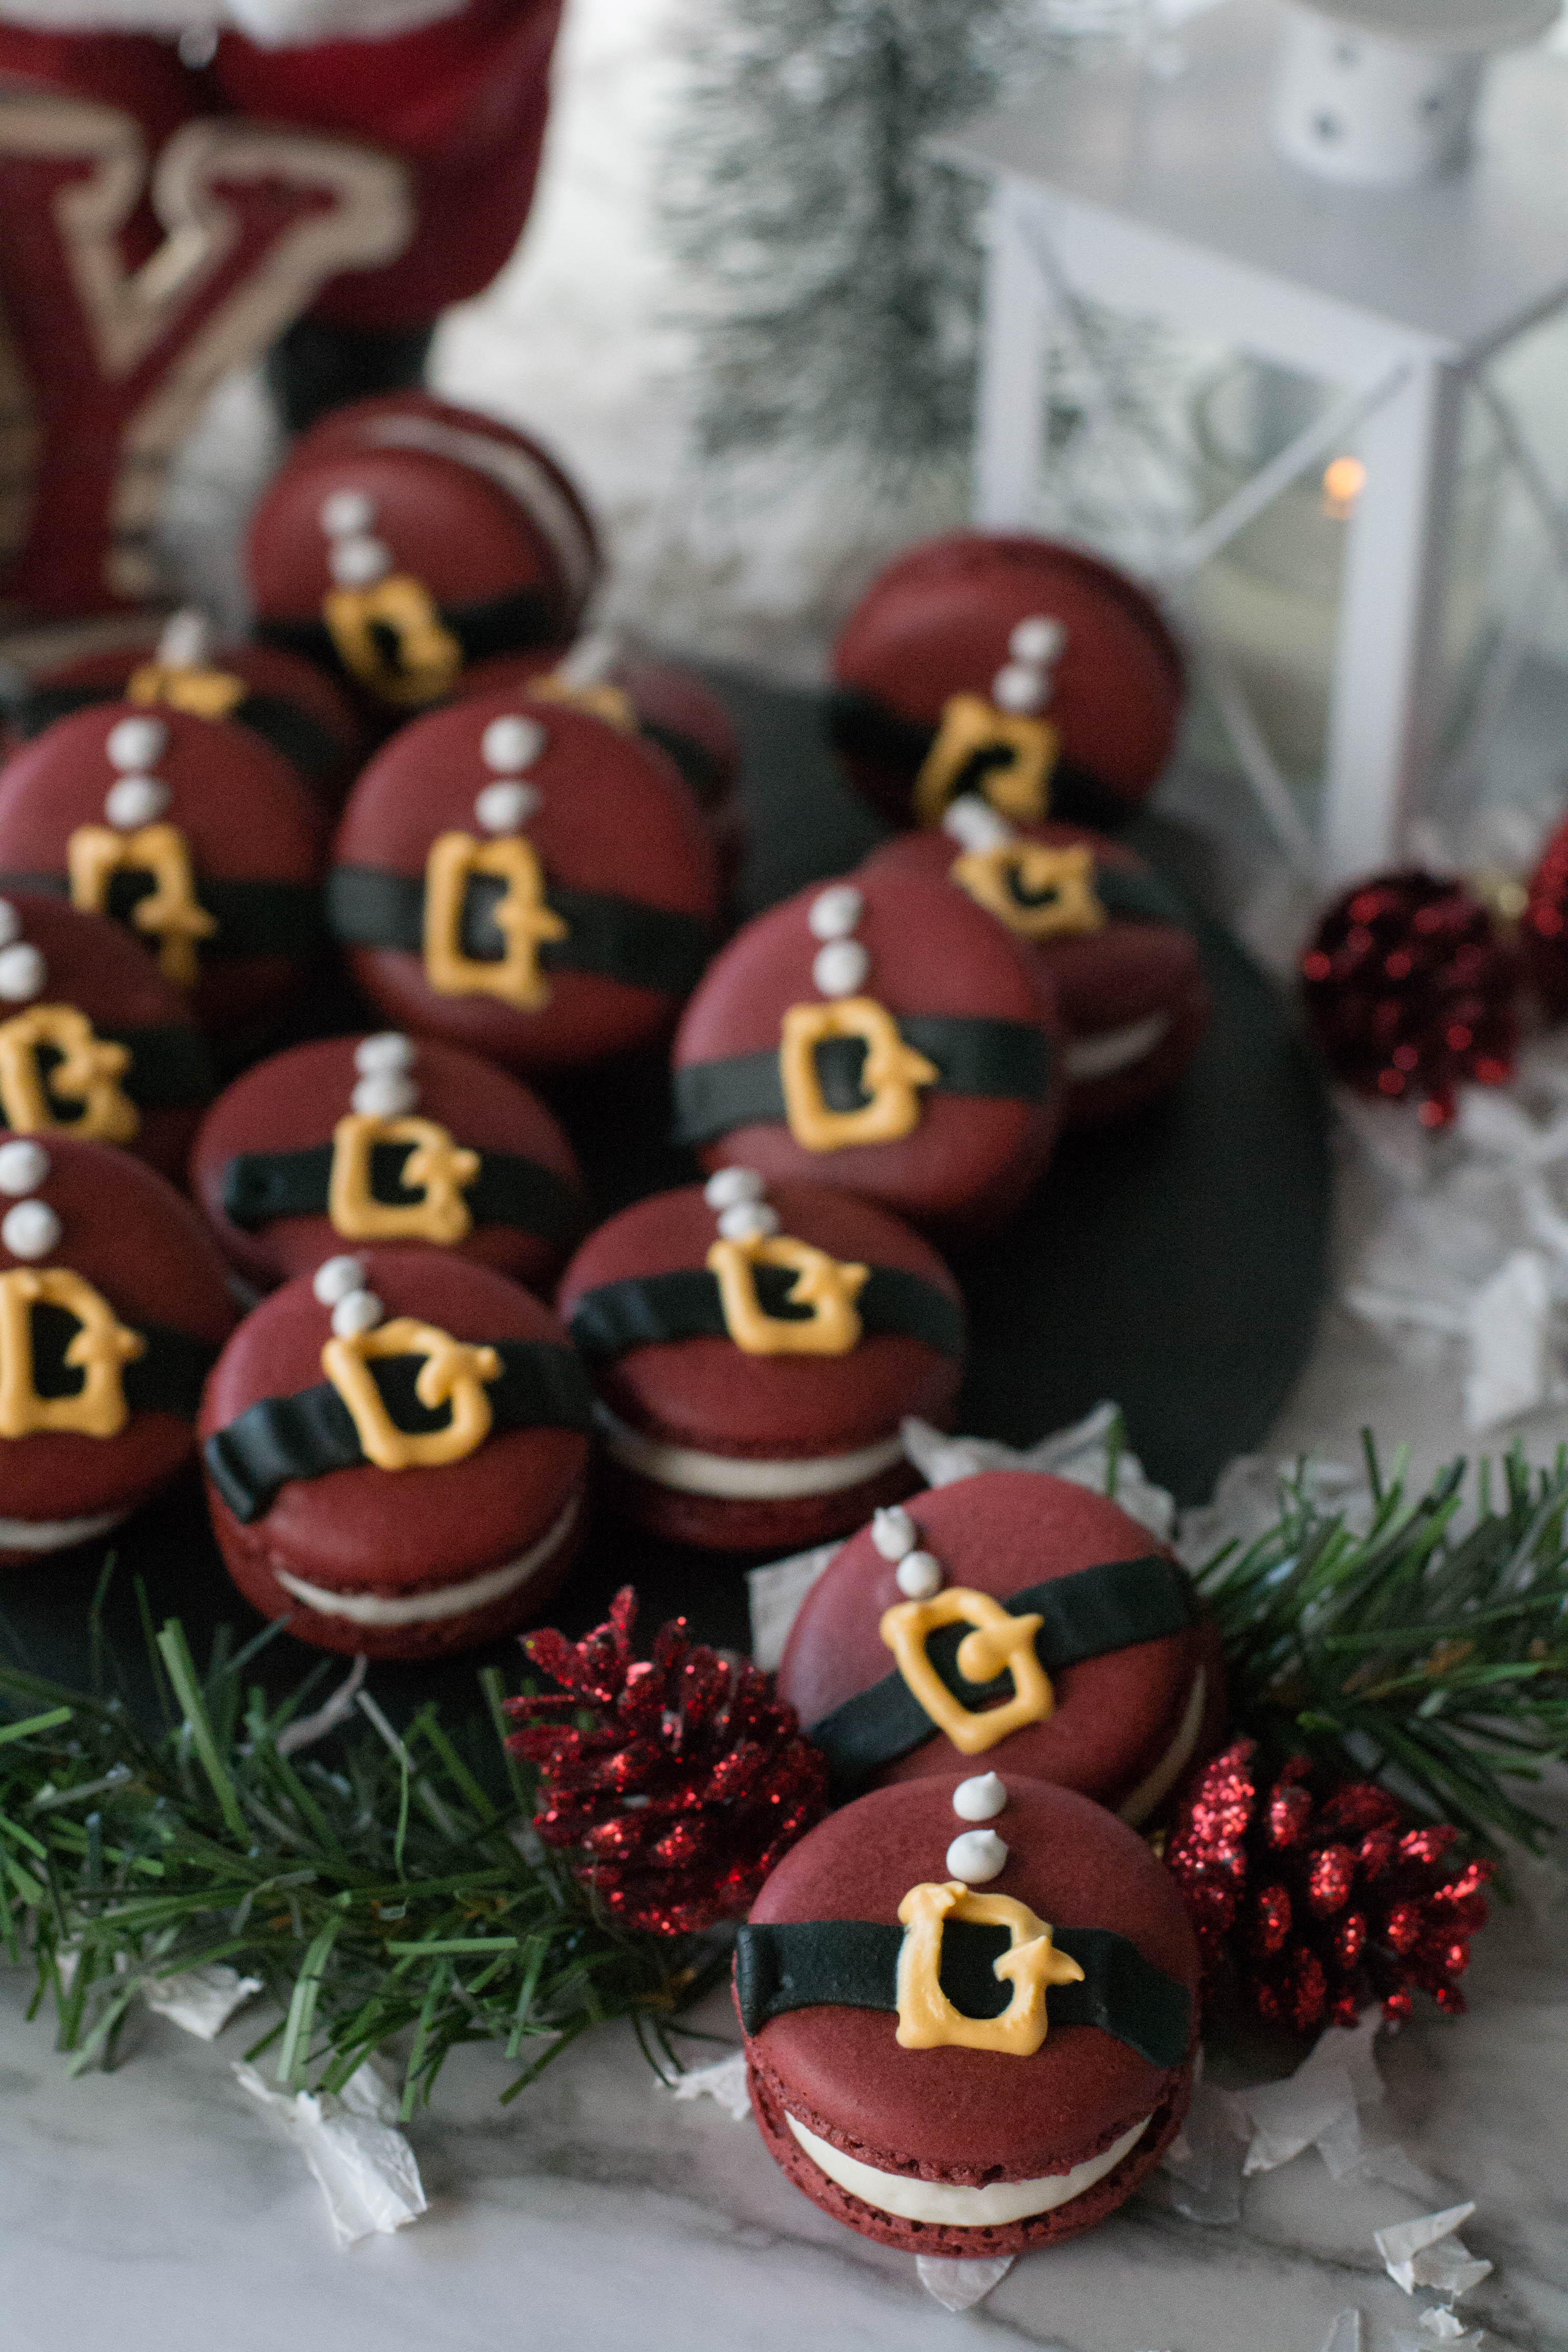
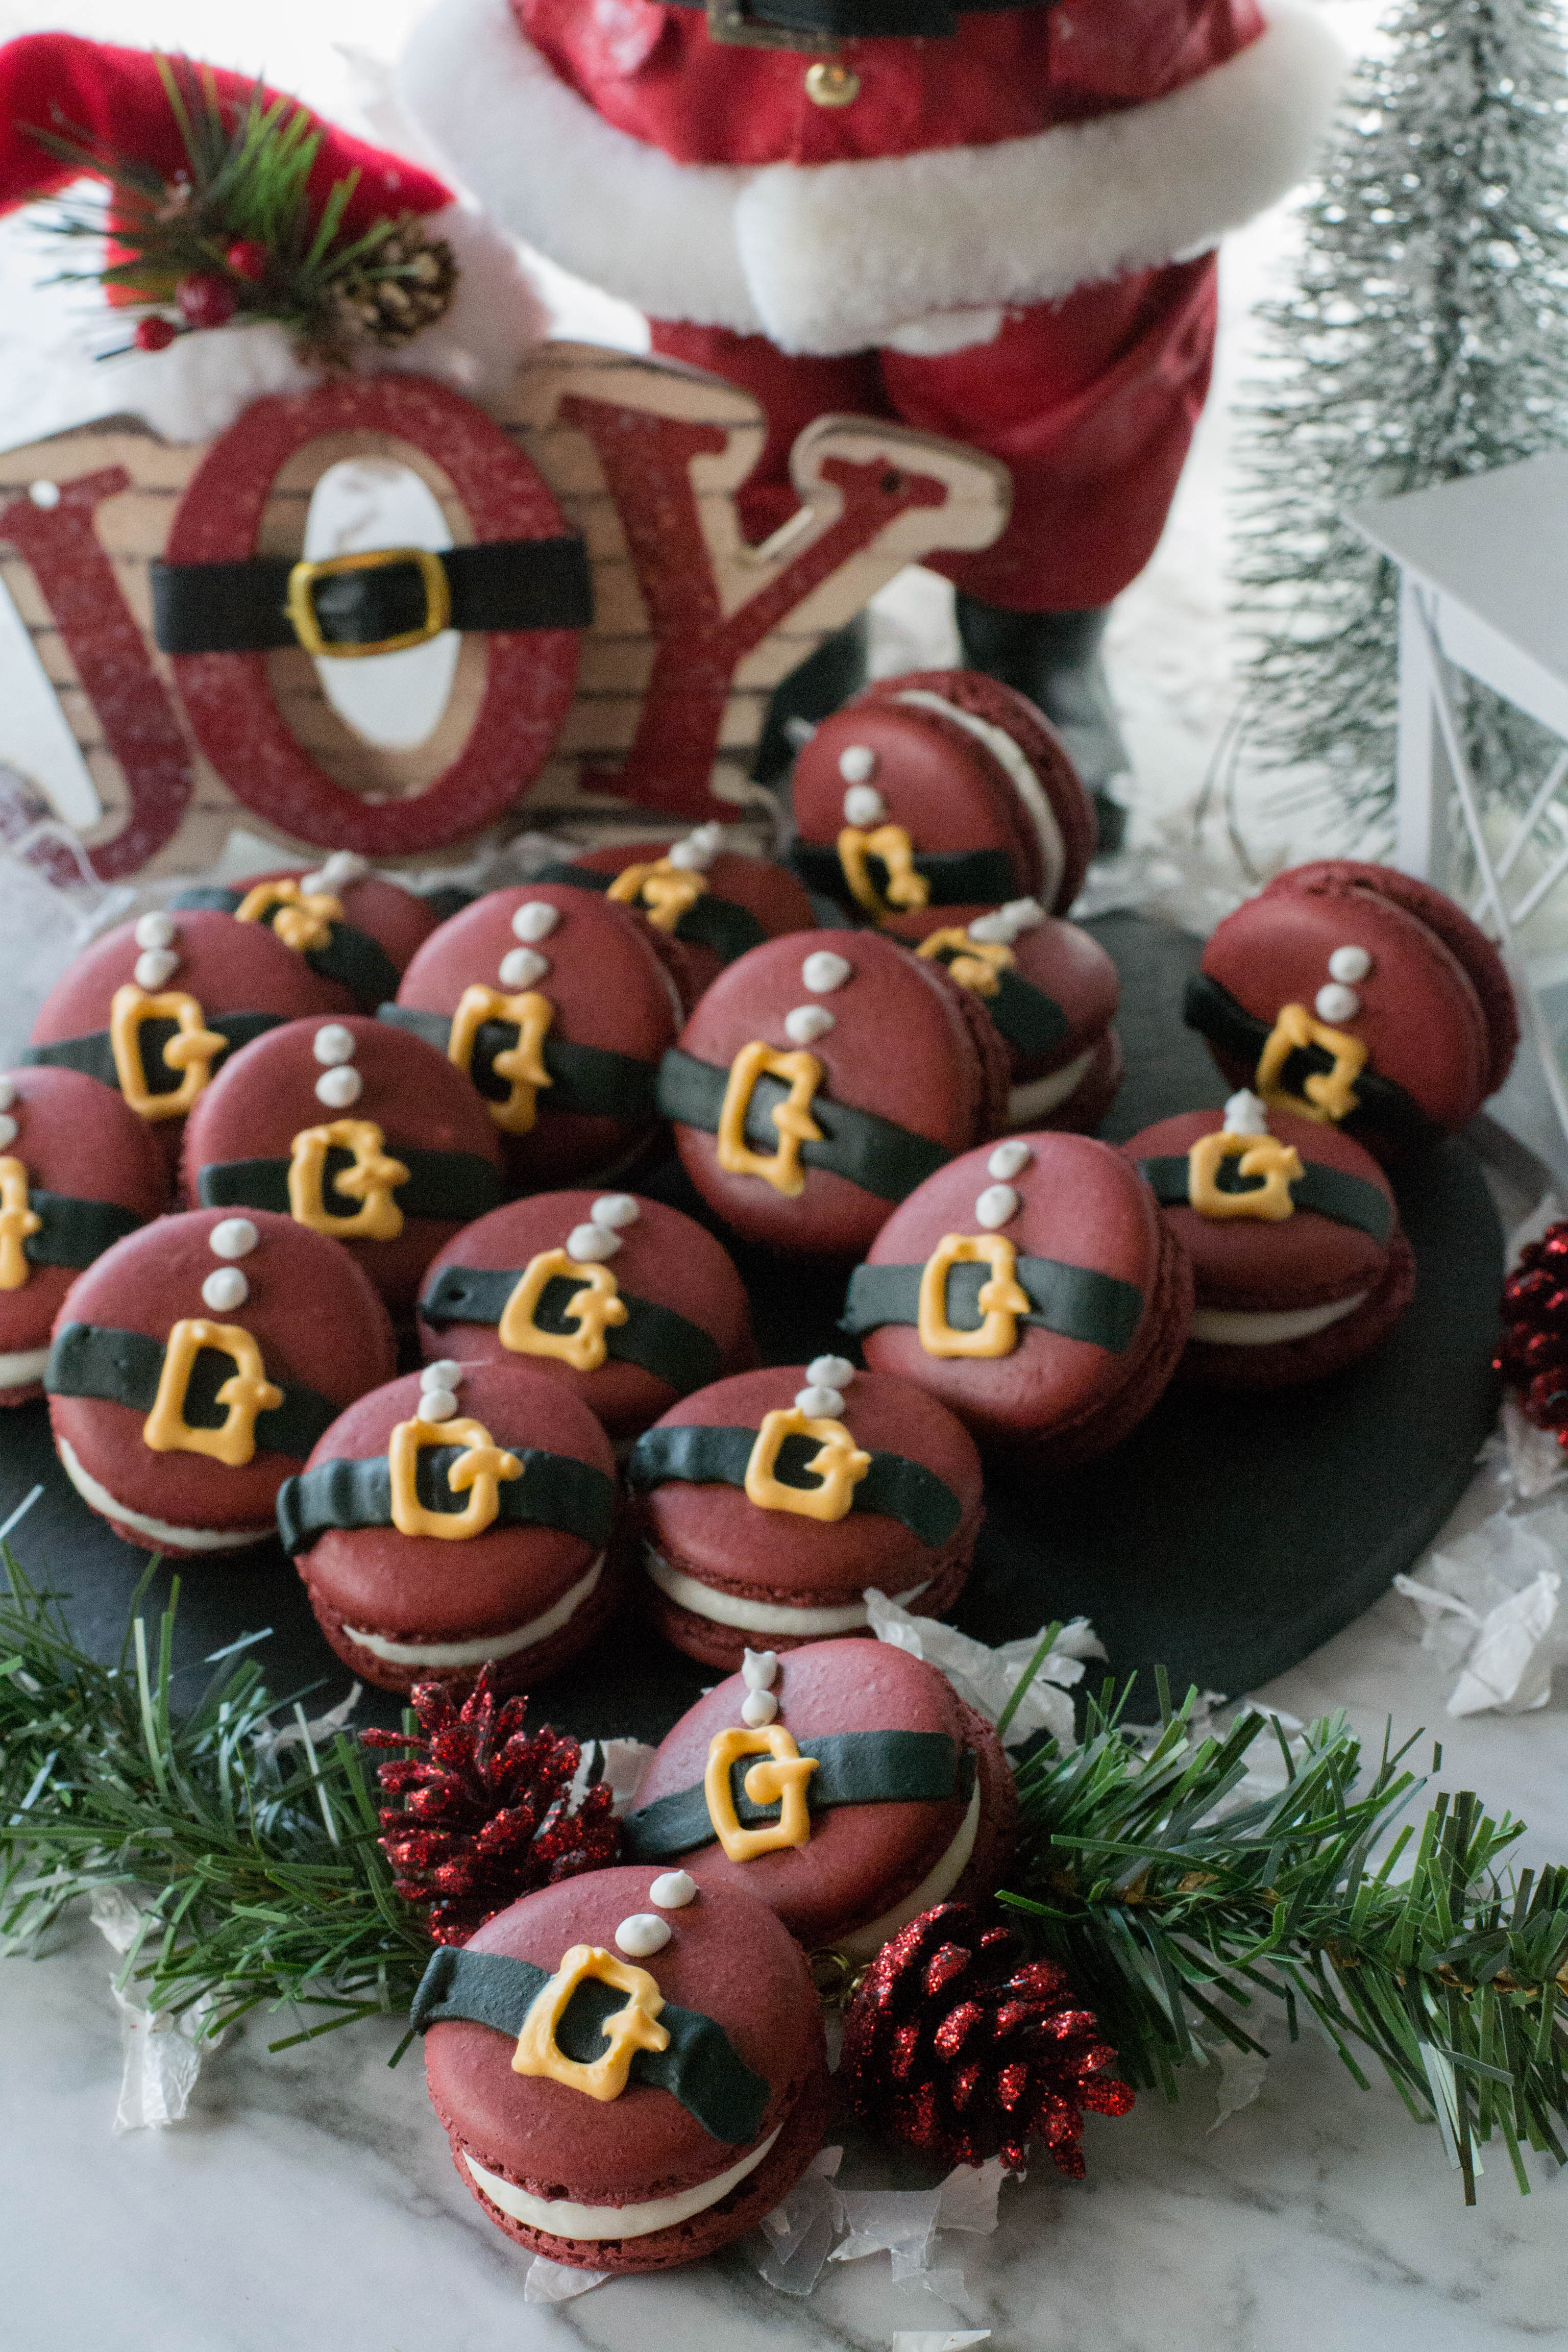
Crispy and chewy, Red Velvet Macarons are sure to be a hit for the Holidays.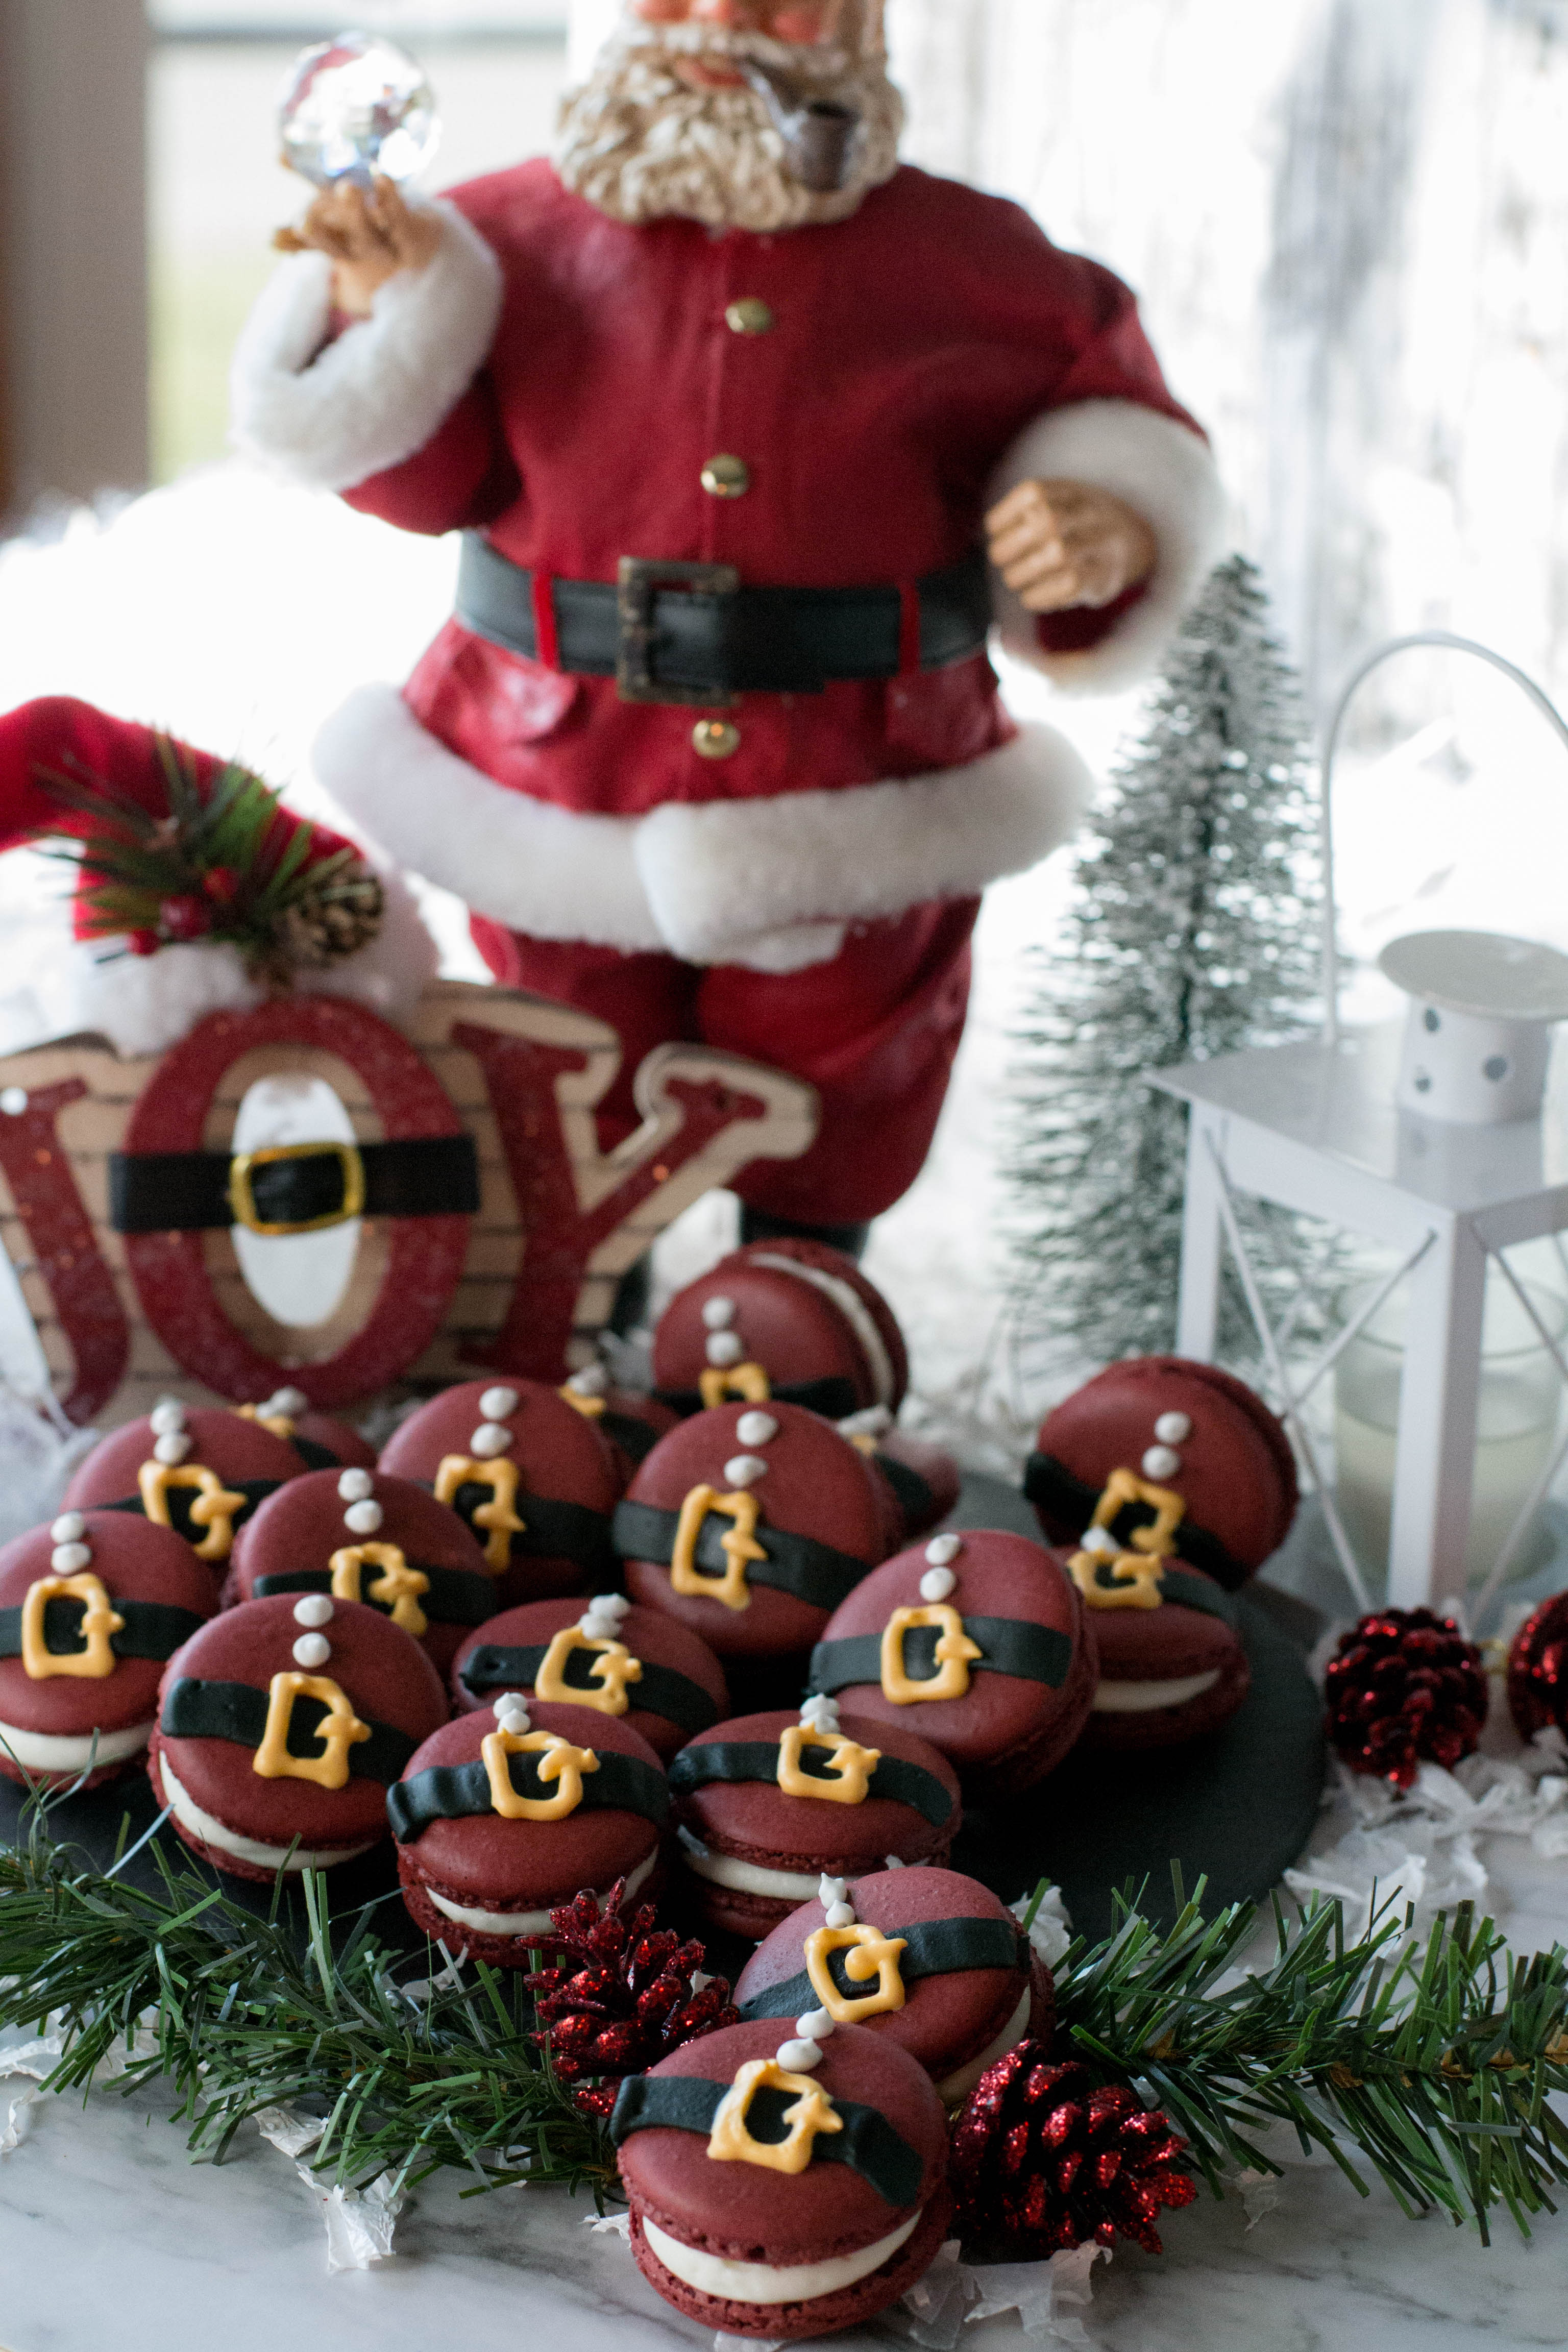
For my birthday, not this year but last, my brother and his girlfriend bought me a macaron kit. Just to tell a tale on myself……I procrastinate, and then I procrastinate some more……so is my story of macarons.
I have wanted to make these beautiful little cookies for some time. Truth be told, I was scared to try them. I can bake, but I wouldn’t say I’m a baker and they looked hard to make….and complicated, and I read a few recipes and there are weather concerns (humidity), and don’t over mix them, and on and on……Did I want that pressure?
Turns out I did! For my first attempt at macarons, they turned out fabulous. Crispy on the outside, chewy on the inside and they had the “feet” that all the you tube videos I watched said they needed.
This is not my recipe. I found it on Pinterest and a huge thank you to Shinee at Sweet & Savory for making a recipe that was easy to follow and made my first macarons perfect. Shinee also has a video that will give you the confidence to try Red Velvet Macarons or any of her other flavors of macarons.
The only concessions I make to her recipe was using the silicone mat that came with my macarons kit. The circles are already on the mat, you just put the mat on a baking sheet and pipe the batter into the circles. Makes a perfect macaron every time.
The kit also came with a……for lack of a better word, contraption, that you put the batter in and you squeeze it to deposit the batter onto the mat. In the future I believe I will use a pastry bag ( I use disposable one) and a large round tip. The contraption was messy and not fun to clean.
With a large amount of angst I began the process, followed the recipe step by step, I swear I held my breath the whole time they were in the oven, then breathed a collective sigh of relief when they came out perfect!!!!
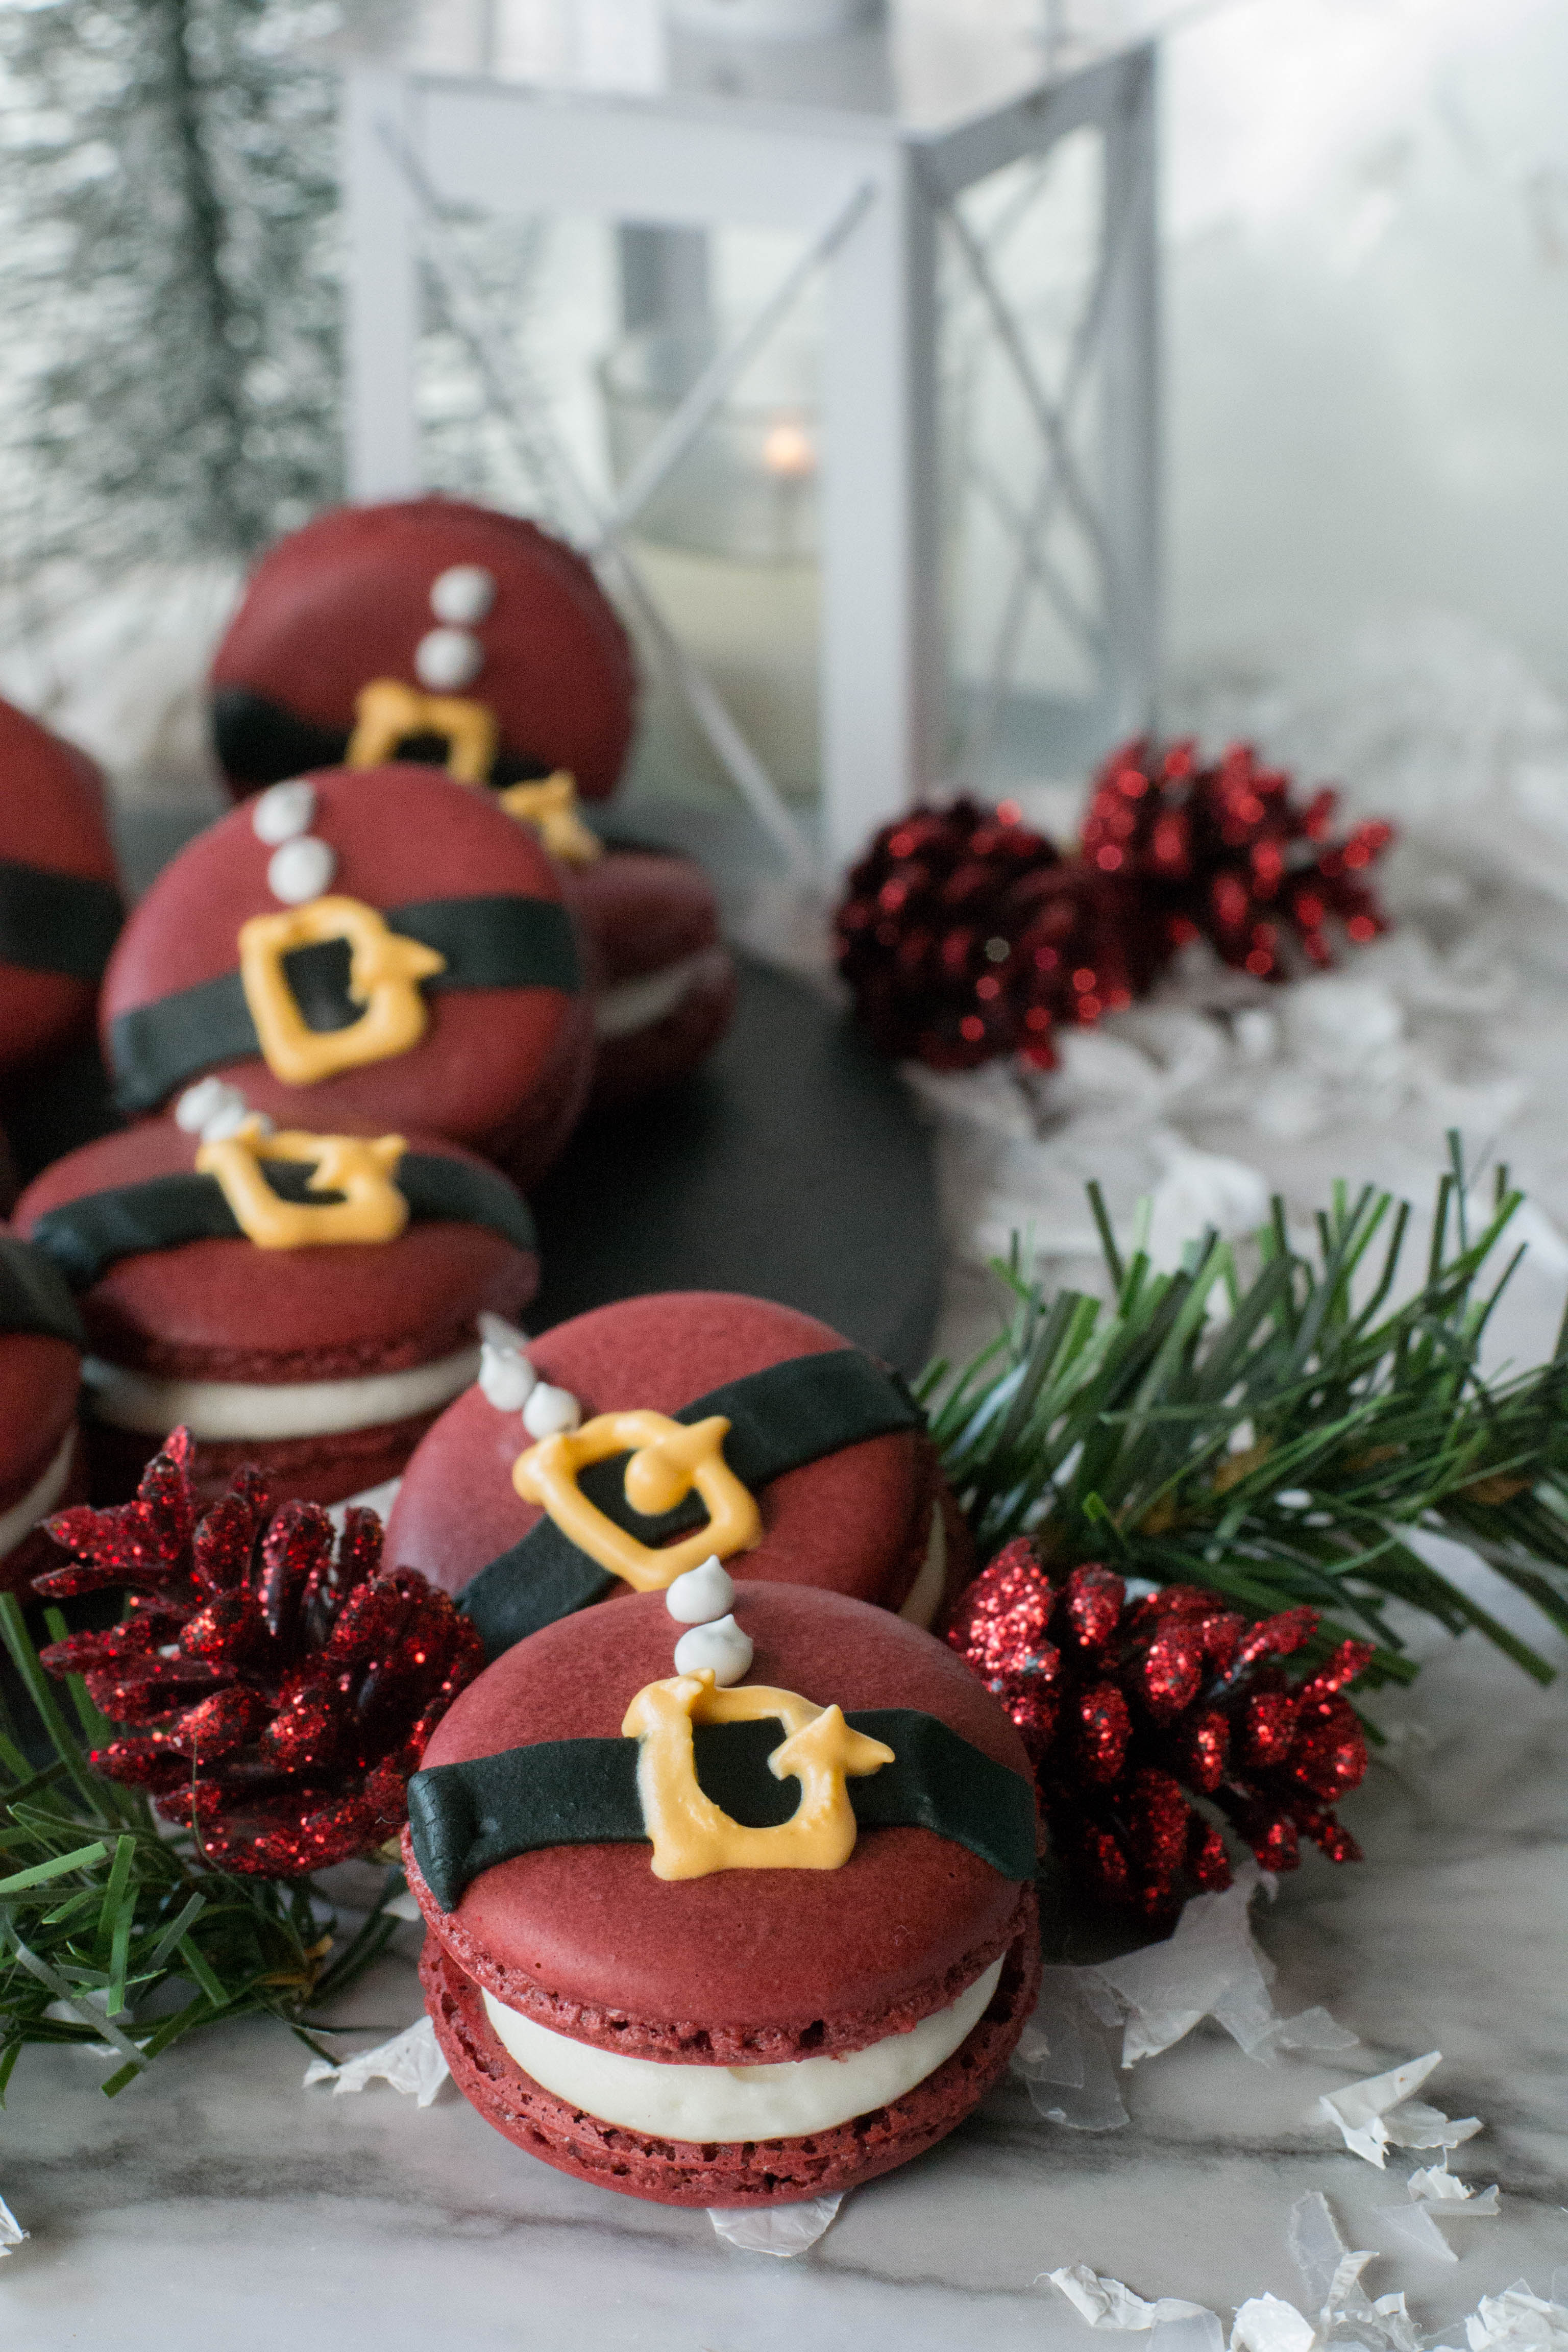
My other variance from the original recipe was that I decorated mine like a Santa belly…just for Holiday fun. These would also be perfect for Valentines Day with their beautiful red color.
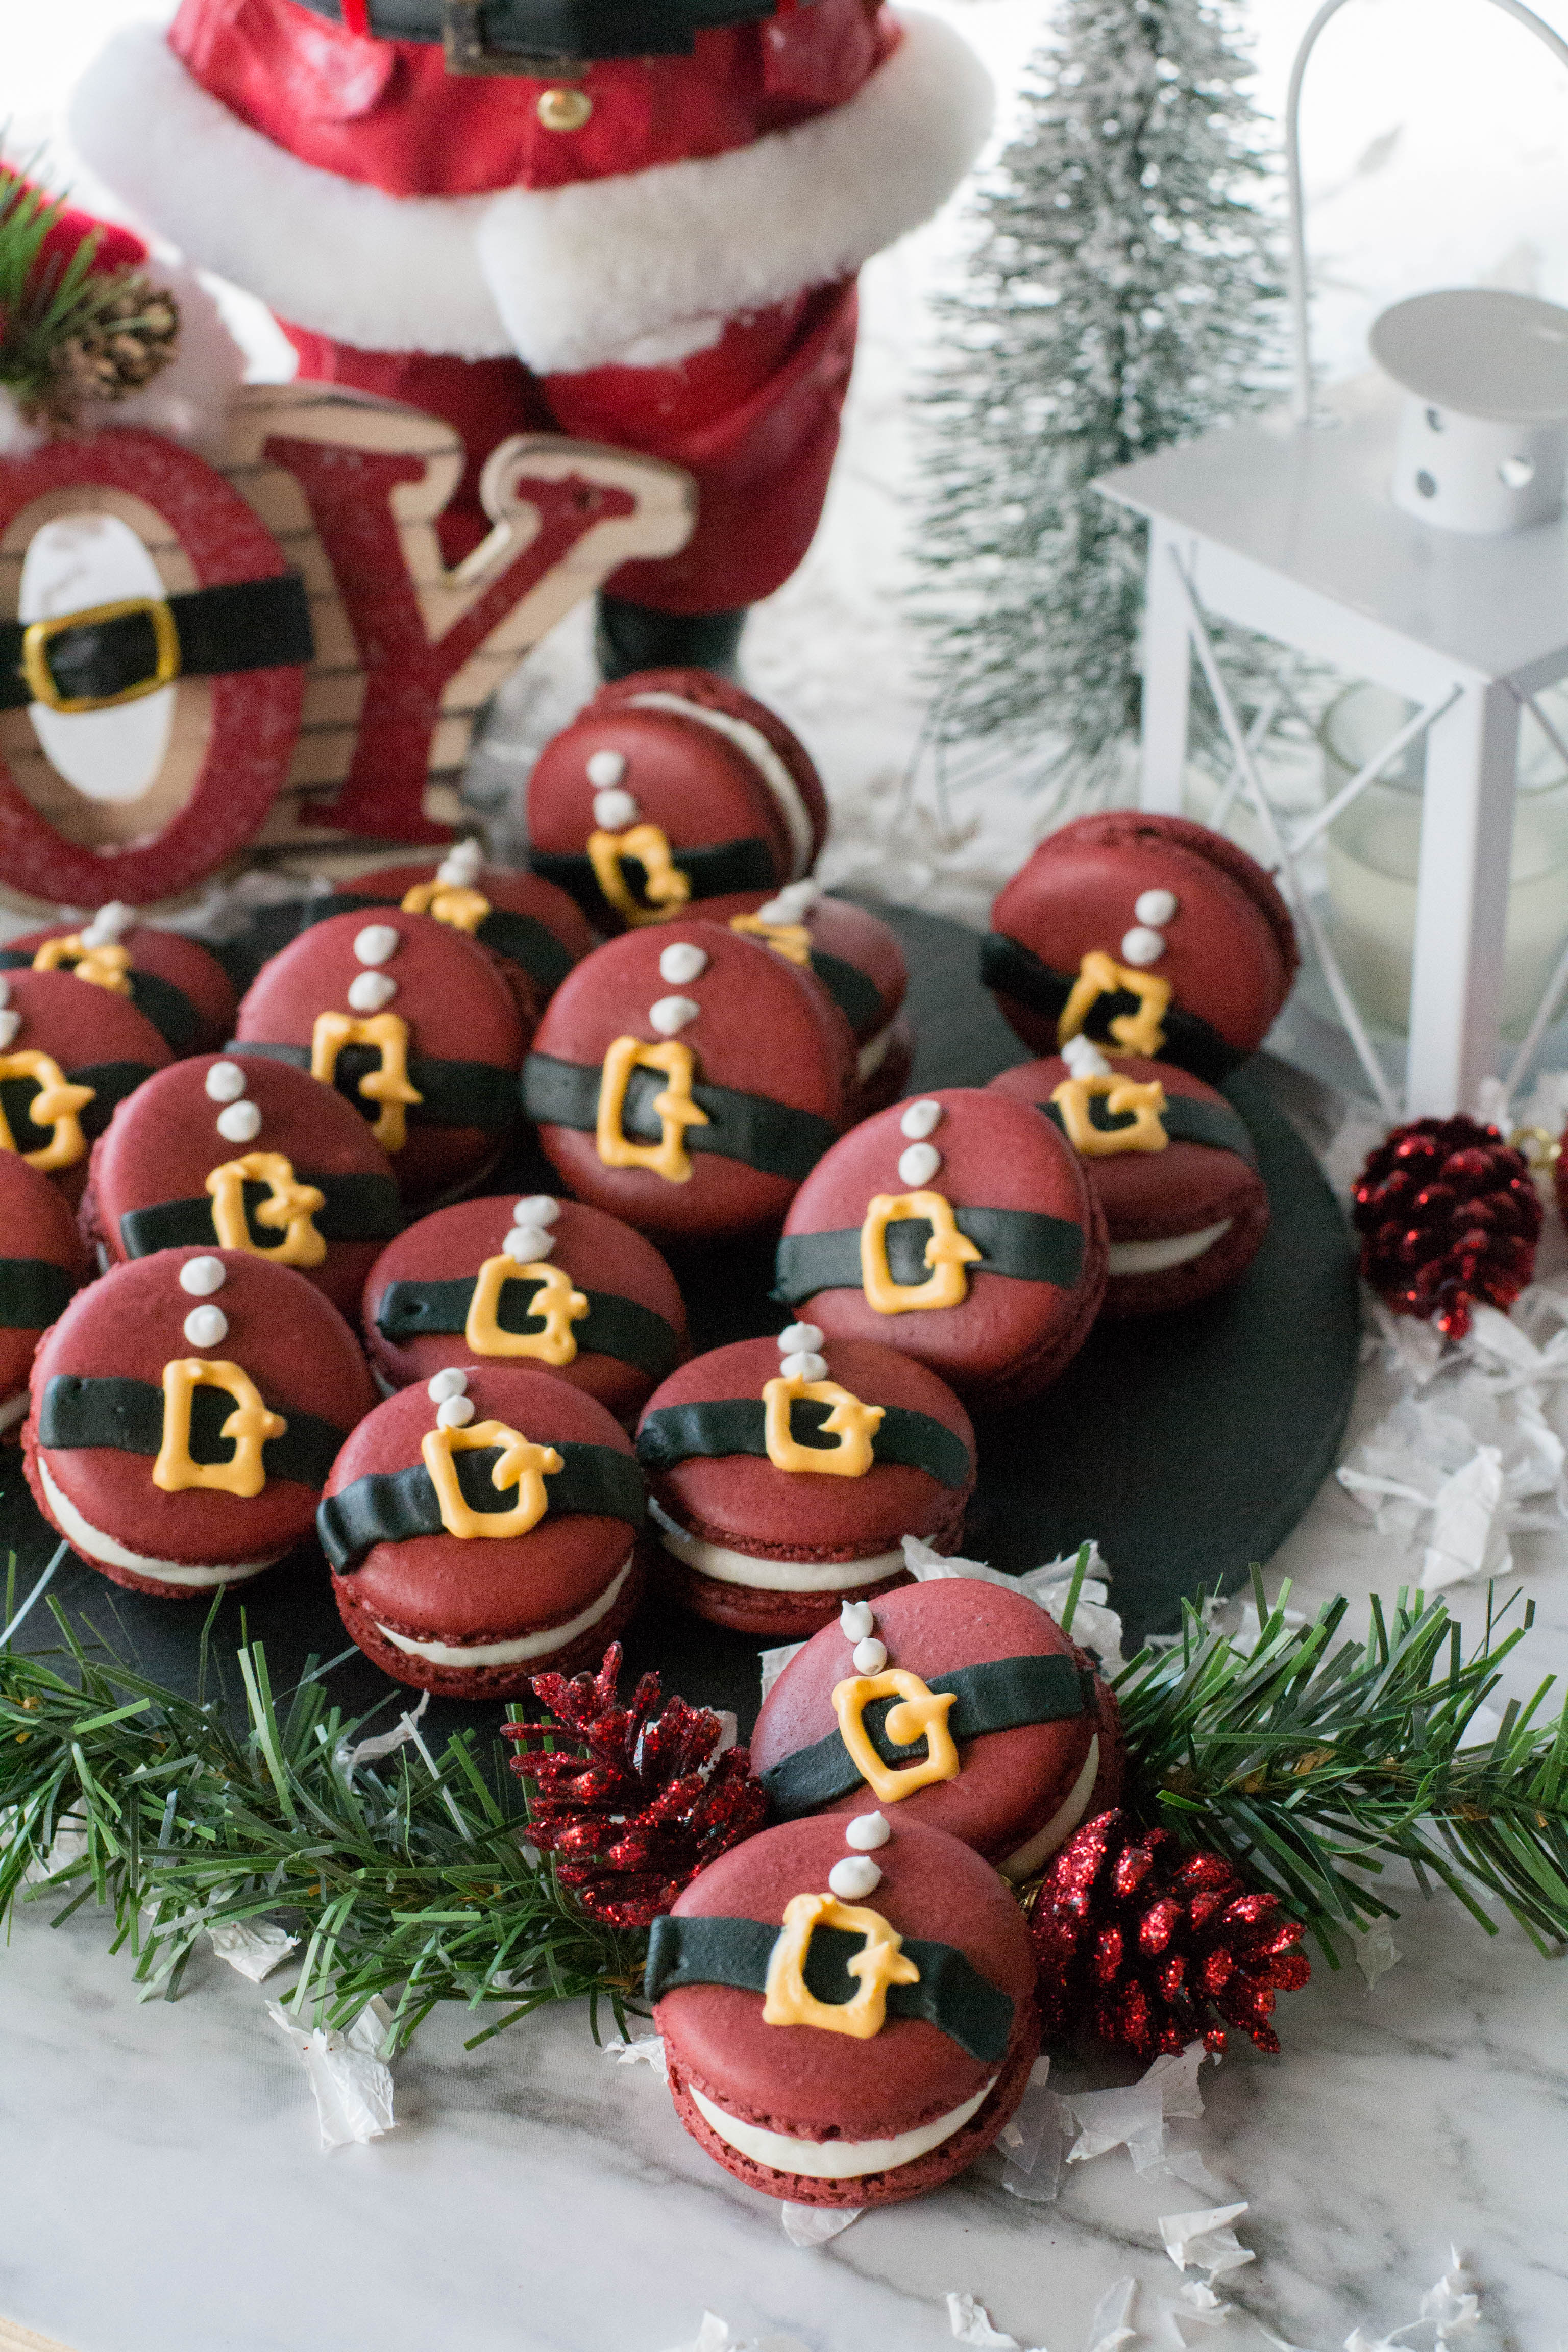
To decorate Red Velvet Macarons as Santa belly’s use a flat decorating tip and back icing to place a flat line across the cookie about 1/3 of the way down. With a small round tip and yellow/gold icing pipe a buckle in the middle of the belt. Place two white buttons above the belt using a small decorating tip. If you do not have decorating tips you can achieve the same look by placing the colored icing in plastic bags and cutting off a corner to form your own piping tip.
If you have ever wanted to try making macarons this is the recipe to try. Red Velvet Macarons can be a jolly addition to your Holiday baking.
Print
Red Velvet Macarons
- Yield: 25
Ingredients
- For macaron shells:
- 1 cup almond flour
- 3/4 cup powdered sugar
- 1 tablespoon unsweetened cocoa powder
- 2 large egg whites
- ¼ teaspoon cream of tartar
- ¼ cup sugar
- 1 teaspoon pure vanilla extract
- ½-3/4 teaspoons red gel food coloring
- For cream cheese filling:
- ¼ cup cream cheese, softened
- 2 tablespoons unsalted butter, softened
- 1 cup powdered sugar
- 2 teaspoons heavy (whipping) cream
- ½ teaspoon pure vanilla extract
- 1/8 teaspoon salt
Instructions
- In medium bowl, sift together almond flour, powdered sugar and cocoa powder twice.
- In a large mixing bowl with whisk attachment, beat the egg whites on medium speed until foamy. Add cream of tartar and continue to beat. Slowly add sugar one tablespoon at a time. Increase the speed to medium high and beat until hard peaks form. Add vanilla extract and red food coloring. Beat on medium speed for one more minute.
- Sift the almond flour/powdered sugar mixture over the whipped egg whites.
- Gently fold the mixture running the spatula clockwise from the bottom, up around the sides and cut the batter in half. The batter will look very thick at first, but it will get thinner as you fold. Be careful not to over mix it though. Every so often test the batter to see if it reached the right consistency.
- To test the batter, drop a small amount of the batter and count to ten. If the edges of the ribbon dissolve within ten seconds, then the batter is ready. I repeat, do NOT mix again. If you still see edges, fold the batter couple more times and test again. This step is so crucial, so please make sure to test often to ensure not to over mix the batter.
- Transfer the batter into a pastry bag with a round tip.
- Pipe out 1.5-inch rounds about an inch apart on two baking sheets lined with parchment paper.
- Tap the baking sheets firmly on the counter a few times to get rid of any air bubbles. If you don’t release the air bubbles, they will expand during baking and crack the beautiful macarons shells.
- Let the macarons rest and dry for 15-30 minutes. On a humid day, it might take an hour or so. To see if it’s ready to be baked, lightly touch it. If the batter doesn’t stick to your finger, then it’s ready.
- Preheat the oven to 300°F (150°C).
- Bake the macarons for 18-20 minutes. To check the doneness, gently remove one macaron. If the bottom does not stick, they are done.
- Transfer to wire rack to cool for 15 minutes, and then remove from the baking sheets.
- While macarons are drying, prepare the cream cheese filling. In a mixing bowl with whisk attachment, beat the cream cheese and butter until fluffy. Add powdered sugar, heavy cream, vanilla extract and salt and beat until well combined.
- Transfer the filling into a pastry bag and fill the macarons. It’s best to serve macarons the next day.
- Store the filled macarons in airtight container in the fridge for up to 5 days. You can also freeze the filled macarons in airtight container for up to 5 months.